What’s this about?

This site is an official rules reference for Deliverance by Lowen Games.
It’s great for finding a specific rule quickly. It’s also an excellent supplement to the rulebook included in the box, when watching a how-to-play video, or while teaching the game.
Dynamic Rules
The Deliverance Rulepop dynamically adjusts the rules to fit the game mode you choose in settings.
Usage Tips
Back & Forward Nav: Think of each rule entry as a separate webpage. If you want to jump back, hit your Back button.
Check the Index : Don’t see what you’re looking for? The Index has every term in the game.
Install it: This site is a (Progressive Web App). You can install it as a standalone app that is lightning fast, and works even when you’re offline.
Link to a rule: Want to share a link to a particular rule? Just click its title!
Credits
- Game Designer, Author, & Lead Developer
- Andrew Lowen
- Lead Artist
- Dan Maynard
- Cartographer
- Yoann Boissonnet
- Graphic Design
- Chip Cole, Adam Glass, Thomas Robb, Chazz Young
- Game Developer
- Chazz Young
- Editors & Co-Authors
- Ian Tyrrell, Adam Glass
- Solo Mode Design
- Jamie Jamison & Andrew Lowen
- Sculptor
- Russell Barton
- Insert Designer
- Matt R. Healey
- Game Development
- Ethan Reid, Christopher Spenner, Samuel Healey, Asa Reid, David Roth, Joseph Zmuda, L. G. Larimore, G Wesley Cone, Pablo Barraza, Fons de Vogel, Matt & Emily Hart & the many volunteers that playtested & gave feedback over the years!
- Special Thanks
- Brighton Cablay, who supported me from the beginning and made Deliverance better. Ryan & Jessie Grandon for your relentless encouragement and gifting me your angelic likeness. Kyle Mann for using your voice to lift up a fellow brother. Richard Phillips, Sean & Sarah Bradford, Jonathan Bowman, Hailey Maynard, Cassie Glass, AliaAnn Young, Chris Gwaltney, Bubba Stallcup, Matt Warmbier, Eric Bitterman, Pat Lysaght, Josh & Theresa Wegner, Josh Patton, Roosevelt Cooper, Peter Rowen, Rev. Samuel R. Plymale, Rev. Benjamin Lalka, & Reagan Helms. Ted Apollo for encouraging me and giving me that first push of help. Nick Turchen, Will, Mel, & John from On-Board Gaming for testing without a complaint even when the game was ugly. Eric & Amber Beels, David Diaz, Jason Gibeault. Donnie Chase, Pat & James Aquilone, & Lance Goodwin for volunteering to help me when we were nothing. Members of BNI Escondido.
- Angel Investors
- Thank you for going above and beyond because you believed in me. Jimmy Smith, James Hasner, Gregory Ford, Steven Morgan, Stuart McGregor, Ella Piwki, Peter & Scotty Breuer (Gooo Brethren Games!), Aaron Blakely, Caroline Brown, Blake Fullerton, Love Thy Nerd, Igor Matushevsky, Ashton (you know who you are and I love you!), James Kwan, Alan R. Moon, Gary Yamamura, Håkan Sundell, Tomas E., Edward Piwko, Matthew Nevin, Joe Woodington, Chuck Breen, Ian Yeo, Connor Furlong, Zachariah Lee Foote, James Cundiff, Jamie Jamison, Bryan & Jess Bateman (Go green!)
- Archangel Investors
- I could never have done it without you. Thank you to J.S., Dave Lowen (who has never let me down ever), Julie Lowen (my biggest fan and such a paper tiger… until she is not), Peter & Sally Grandon (Poppy the Archangel & sweet Mia), Erik Anderson, Jonathan Preston, & Peter Friese.
Deliverance is dedicated to my angelic wife, Christine. Without you, this game would have been awful. Thanks for breaking my pride and putting up with my frustration without ever quitting.
- Last checked
Action
Action Token (Available)
Action Token (Used)
On their turn, angels and demons use actions to activate skills and card effects. Actions are tracked with action tokens — the gold side shows an available action, the gray side one that has been used — and all spent tokens refresh each round in the Refresh phase.
Angel Actions
Each angel begins their turn with two (2) action tokens, marked by the gold symbols on their character board — the actions available to them that turn. Free actions and interrupts do not expend an action token.
An angel may choose any combination of the actions or free actions listed on their character board, Talent cards, or Prayer cards — including those already used — in any order, as long as they can pay each cost.
A skill or card marked may only be used during the angel’s turn, or when an effect grants an extra action to use.
Extra Actions. When an effect grants an angel an additional action — during their turn or outside of it — that action must be used immediately, spent on an action or free action. An action granted outside their turn does not count as another turn.
Demon Actions
Demons of the same type share a single action token, placed on their Battle card on the Initiative Track rather than on individual boards, and they act together.
On its turn, a demon type flips its token to the gray side, then rolls a die to determine its action from its character board; every demon of that type takes that same action, one at a time.
Extra Actions. An effect may grant an individual demon an extra action. Roll a die for it and resolve it immediately, for that demon alone — not others of its type — and its activate skills do not trigger again. An extra action does not count as another turn. If the effect doesn’t name which demon acts, it’s the lowest-numbered demon of that type on the battlefield.
Action Phase
Choose the first angel to act and give them the Angel Initiative token. It marks the first angel for the round and doesn’t move until the next round.
The angel holding the Initiative token takes their turn, using any available action, free action, or interrupt on their character board, Talents, Prayer cards, or Heavenly Treasures.
Resolve that angel’s end-of-turn status effects, positive effects first, then negative.
-
The leftmost demon type with an available (gold-side-up) action token on the Initiative Track takes its turn. Flip that token grey, then work down its board:
Resolve any activate skills one at a time — equipped Talent first.
Read any special-rule — it may alter the usual rules.
Roll one 6-sided die to determine the action. Every demon of this type uses that same action.
Resolve the action one demon at a time, starting with the lowest-numbered demon of the acting type.
Resolve that demon’s end-of-turn status effects, positive first, then negative.
-
Repeat, alternating angels and demon types — angels in clockwise order, demon types along the Initiative Track — until all have acted.
If the last demon of the first battle is defeated before that, stop there and move straight to staging the Final Battle.
Activate
An activate effect resolves on its own rather than being chosen as an action. When and how often it fires depends on where it appears:
- Demon Talents & character boards.
- Once per round.
- At the start of that demon type’s turn, before it rolls for actions.
- Talents first, then the character board.
- Darkness & Prince Darkness cards.
- Heavenly Treasure cards.
- Only once — when the treasure is gained.
- If gained during setup or between battles, it activates once staging is complete — after all demons, saints, and angels are placed.
Allies
Allies fight alongside their angel companion and are controlled by the same player.
Ally board
Like angels. Allies are targeted and damaged like angels, and their movement, range, and targeting follow the angels’ rules. They may protect saints and gain shield and status effects.
Unlike angels. Allies cannot gain Courage or use Prayer cards.
Not an angel. When counting angels, exclude allies. An ally adds no map tiles or Battle cards during setup, no health to a Fallen Prince, no Darkness cards to the Darkness track, and no damage to an effect dealt per angel.
Protected from Darkness. While an angel is on the battlefield, allies under their control are unaffected by Darkness cards and excess Darkness. If an angel is defeated, allies under their control are affected by Darkness.
Defeat. You revive an ally any way you would an angel. Players lose the game only if all angels and allies are defeated.
Nezzy
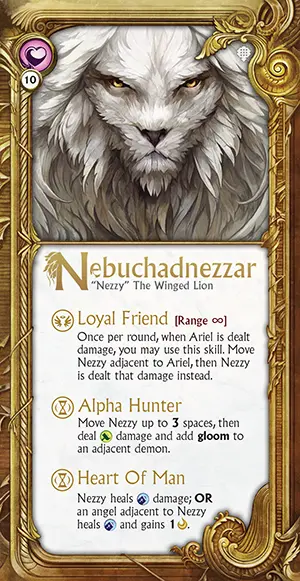
Nebuchadnezzar, “Nezzy” the Winged Lion, is a Living Creature that aids Ariel in battle. His skills use Ariel’s stats, but he has his own health pool. He does not gain Heavenly Treasure or Talent cards, and he has no action tokens of his own — he uses actions only when Ariel’s cards grant them. During setup, his card is placed next to Ariel’s character board, rules side down.
Angels
The angels are the Forces of Light — the heroes the players command against the demons. Every angel acts from a character board, laid out the same way for each.
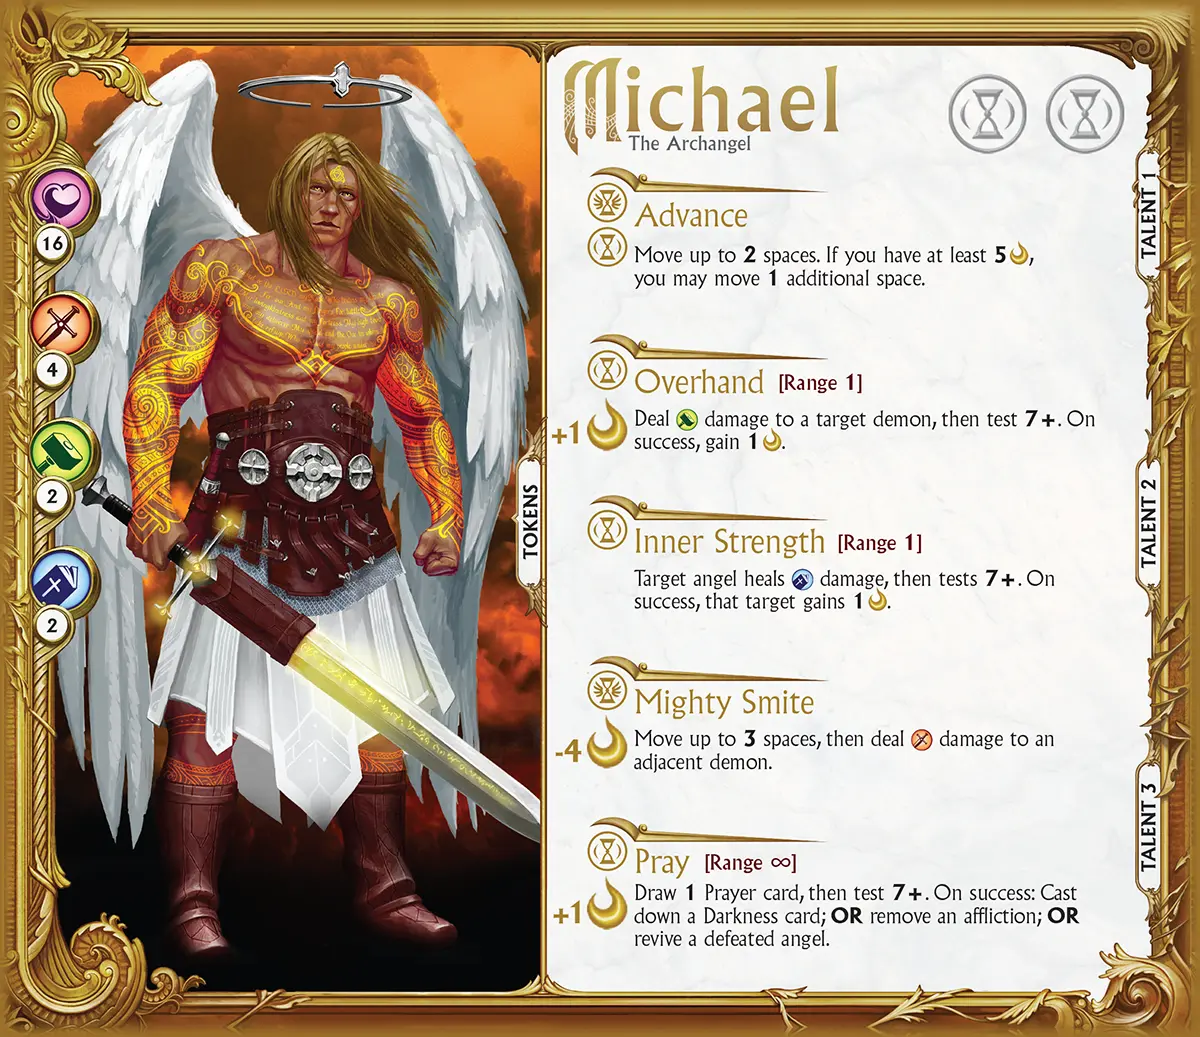
-
Health. An angel’s Health is the most damage they can sustain before being defeated.
-
Stats. Strength, Discipline, and Wisdom drive an angel’s skills, often the healing or damage dealt, sometimes movement or range. Each angel uses them differently; the skill text says how. They rise from their base value through leveling upleveling up, Heavenly Treasures, and some Talents.
Actions. The two spaces at the top hold the angel’s action tokens. An angel takes two actions each turn.
Skills. The angel’s menu of skills. Each shows its effect icon(s) along with any range, any Courage it costs or grants (the + or − beside it), and its effect.
Tokens. The area for the angel’s damage, shield, and status effect tokens.
Talents. Three slots for equipped Talent cards, which add skills as the angel levels uplevels up.
Battle Cards
A Battle card stages a type of demon: draw one and place the listed saint tokens and demon standees on the map tile spaces that match the card’s markers.
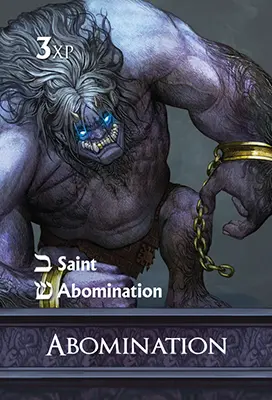
Battle card
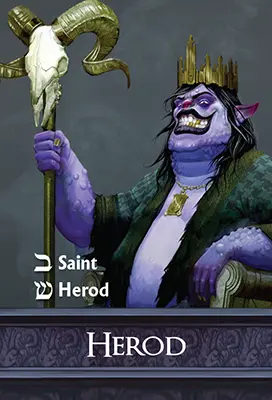
Prince Battle card
-
Experience. The XP the group gains when a minion is defeated.
Experience. Ignore minion XP during a campaign — XP comes as end-of-mission rewards instead.
Staging. Place demon standees and saint tokens on the tile spaces with matching symbols. Saints start oppressed-side up (blue) and can share spaces with demons, angels, and other saints.
Type. The demon or Fallen Prince this card brings into play, with its character board, standees, and Talents.
Cast Down
When a Darkness card is cast down, it is discarded from the Darkness track into the Darkness discard pile.
A card is only considered cast down when angels remove it from the Darkness board — usually through a Pray action or a Prayer card. A card drawn but discarded before it enters play is not considered cast down.
Components
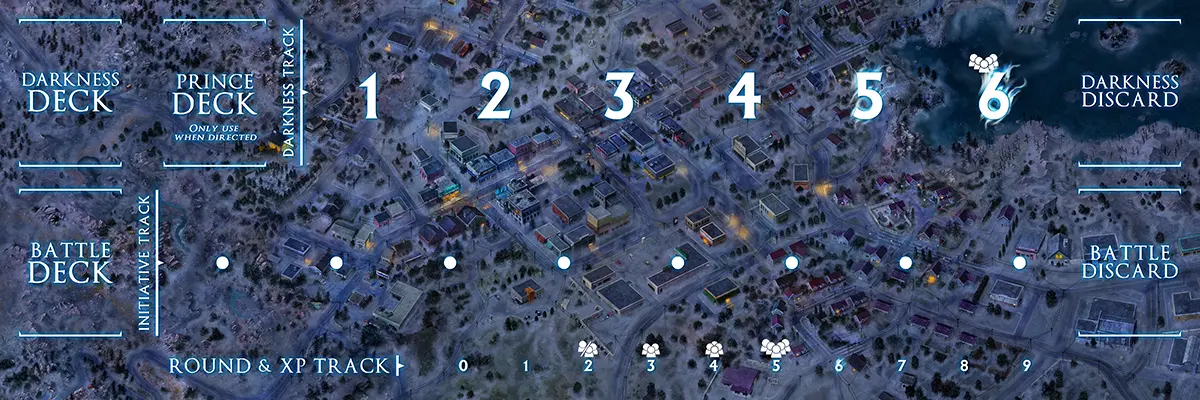
Darkness Board
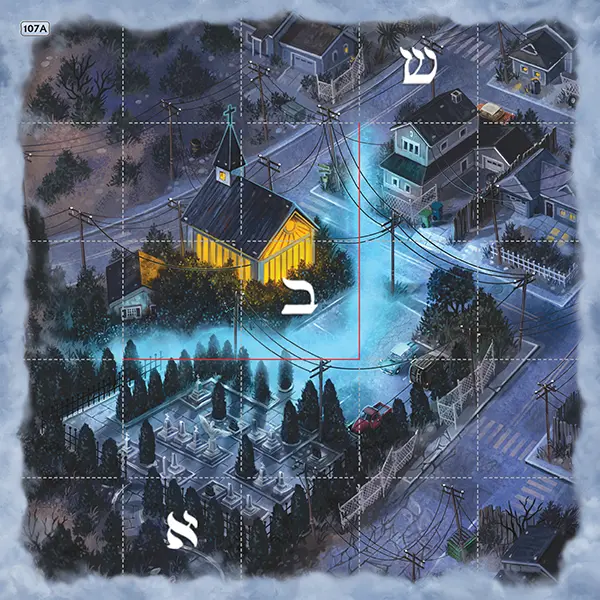 Map Tile
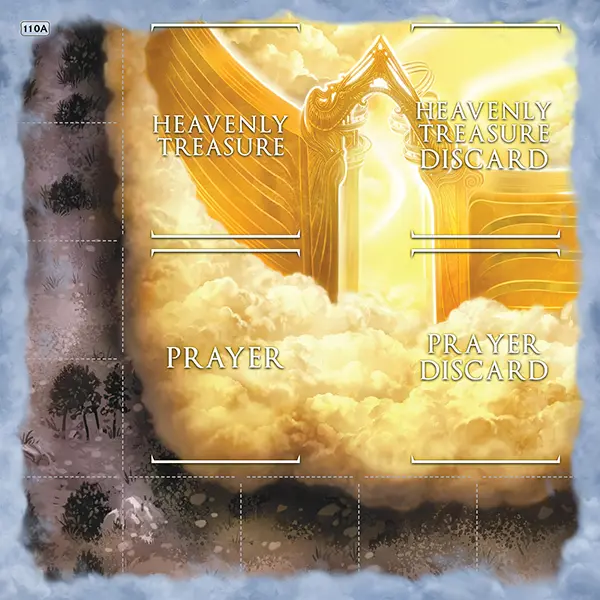 Heavenly Gates Map Tile
- Angel Character Board
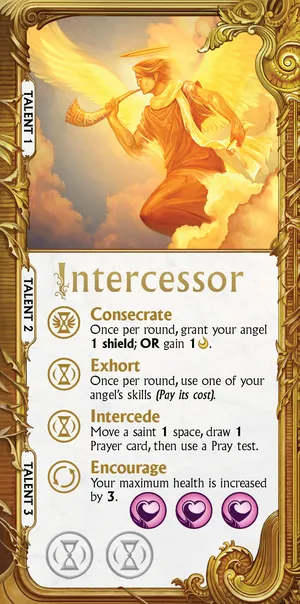 Intercessor Board
- Ally Board
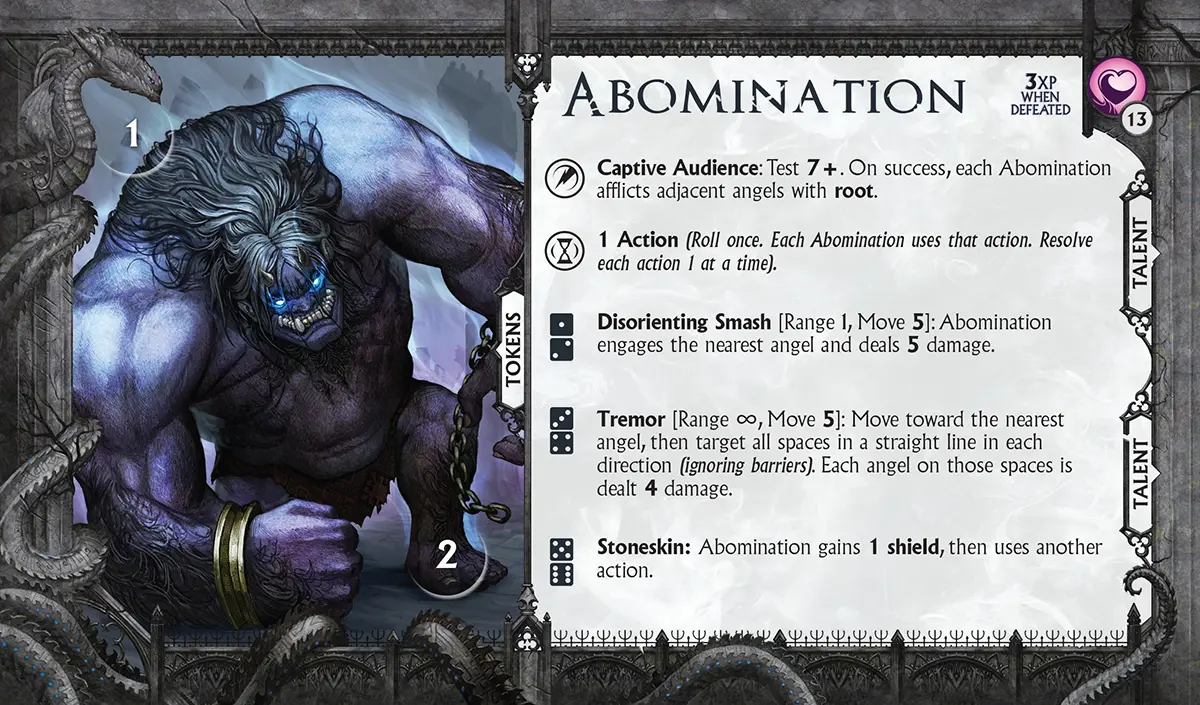 Minion Character Board
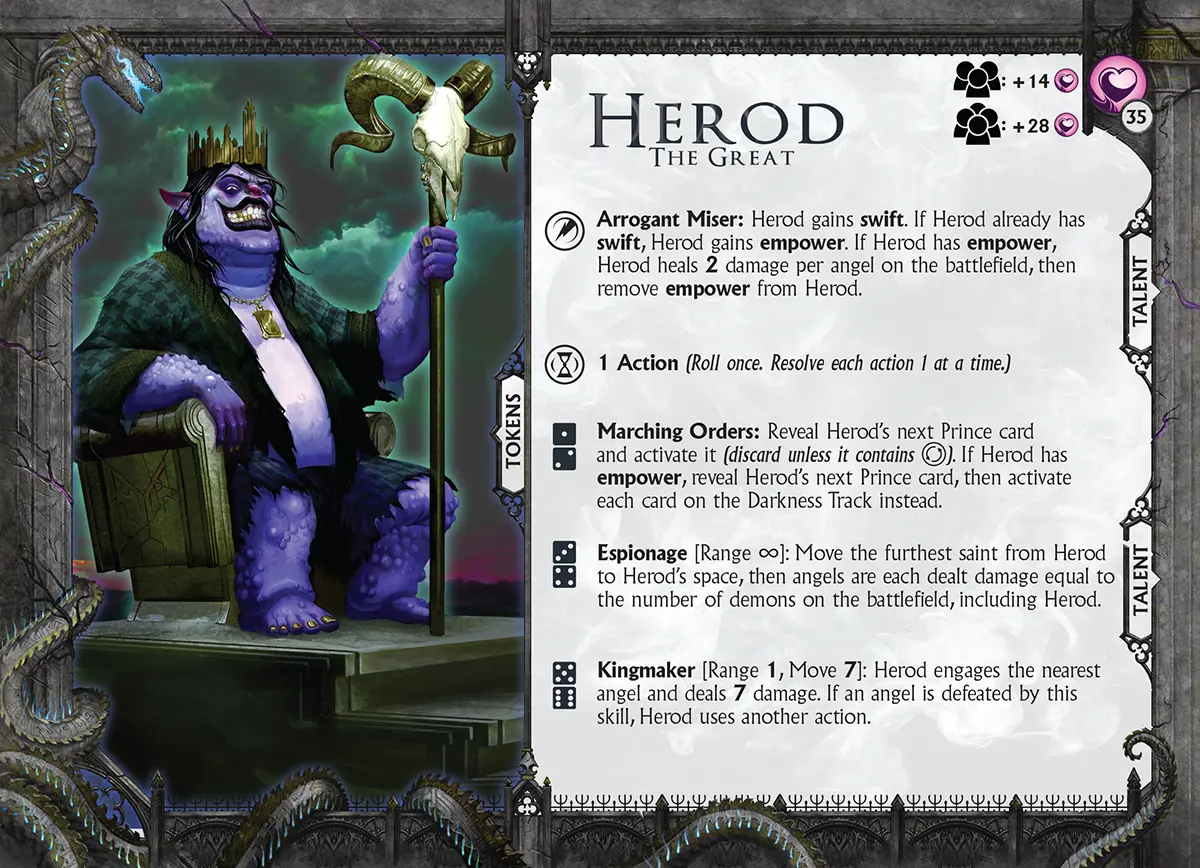 Fallen Prince Board
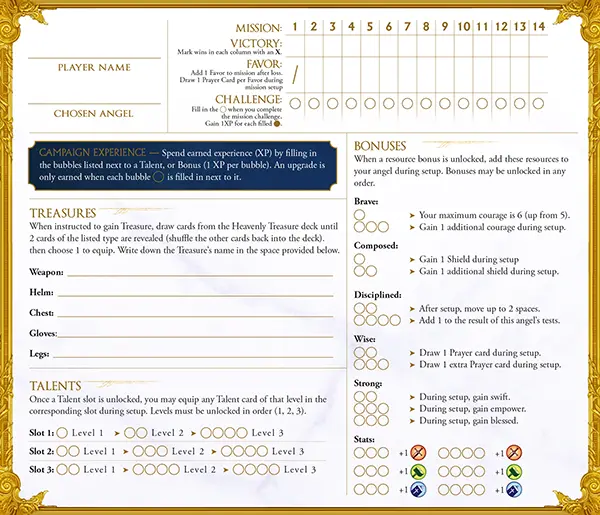 Campaign Tracking Pad
-
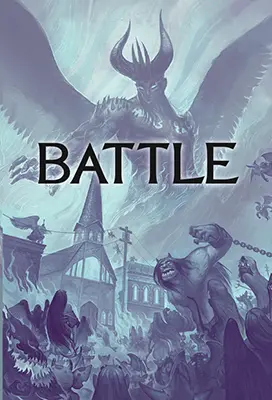
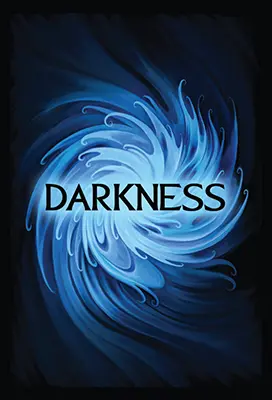 Darkness Card
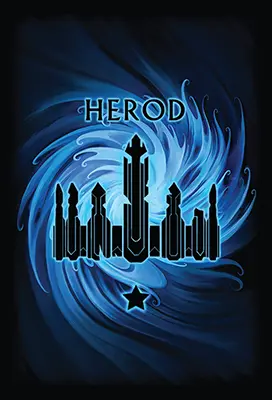 Prince Darkness Card
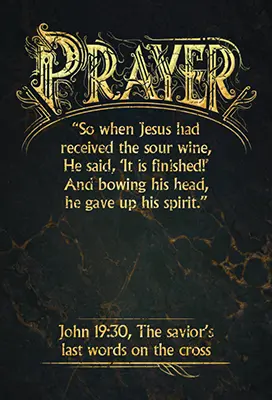 Prayer Card
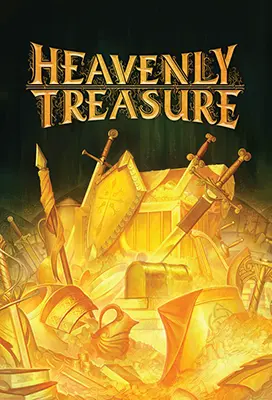 Heavenly Treasure Card
 Angel Talent Card
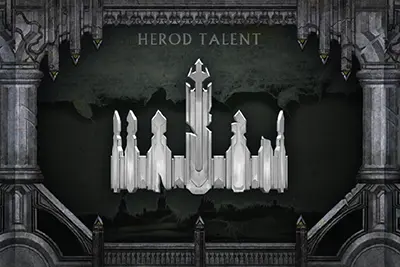 Prince Talent Card
-
-




-
-
-


-


 Initiative Token
 Courage Token
 XP Token
 Round Tracker
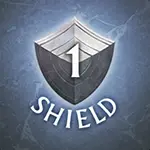 Shield Token
Component Inventory
Deliverance
- 49 Cardboard Standees & 24 Acrylic Bases — Fallen Princes, Angels, Minions, & Acrylic Bases
- 62 Darkness Cards
- 30 Prince Darkness Cards
- 16 Minion Battle + 6 Prince Battle Cards
- 74 Prayer Cards
- 53 Heavenly Treasure Cards
- 150 Angel Talents
- 56 Demon Talents
- 1 Darkness Board
- 6 Fallen Prince Character Boards
- 1 Intercessor Board
- 8 Minion Character Boards
- 9 Angel Character Boards
- 11 Map Tiles
- 150+ Small Round Tokens — Boon, Affliction, Action, Shield, & Damage Tokens
- 27 Large Tokens — Courage, Saint, Damage, Round Tracker, Experience (XP), & Initiative Token
- 1 Campaign Book
- 1 Mystery Campaign Box
- 12 Light/Shadow Tokens
- 4 Custom Dice
- 1 Campaign Tracking Pad
Council of the Fallen
- 40 Cardboard Standees & 20 Acrylic Bases — 9 Angels, 4 Fallen Princes, & 28 Minions
- 34 Darkness Cards
- 20 Prince Darkness Cards
- 14 Minion Battle + 4 Prince Battle Cards
- 34 Prayer Cards
- 26 Heavenly Treasure Cards
- 150 Angel Talents, plus 30 new ones for the base game
- 12 Prince Talents, plus 7 new ones for the base game
- 16 Major + 16 Minor Minion Talents
- 4 Fallen Prince Character Boards
- 7 Minion Character Boards
- 8 Angel Character Boards + 1 Nezzy Board
- 6 Map Boards
- 59 Small Round Tokens — Squall, Blight, Incense, Gloom, Prudence, Health, Raudbjorn’s Axes, & Ziyra’s Shofar
- 6 Veil/Light + 6 Veil/Shadow Tokens
- 5 Quick Reference Cards
- 1 Campaign Book
- 1 Campaign Tracking Pad
- 4 Mystery Campaign Boxes
- 1 Mystery Foil Pack
Courage
Courage tokens are a resource angels spend on powerful skills. Some skills grant Courage (like the Pray skill), and others spend it. Pay a skill’s Courage cost before it activates, even for a free action. Keep Courage and other tokens near the “Tokens” label on the angel’s character board.
Courage limit. An angel may hold a maximum of 5 Courage. If a card or skill would push it above 5, the extra is not gained, unless that card or skill says otherwise.
Damage
Deal damage to the targets equal to the amount listed on the skill or card, and track it with damage tokens on the target’s character board. If the amount of damage is equal to or greater than the target’s health, that target is defeated.
Damage dealt. A demon’s damage is listed in its individual skills. Angels use the relevant stat value or the number listed in their skill. Cards that deal damage list their damage value in their card text.
Bonuses and penalties — item stats, Prayer cards, effects on Darkness cards, and the like — may change the total damage dealt. Any Shield the target has absorbs damage first.
Dividing damage. When damage “may be divided however players choose,” an angel may not be dealt more than their remaining health this way — e.g. if Michael’s maximum health is 16 and he has already been dealt 14 damage, no more than 2 may be assigned to him.
How Darkness Progresses
How the Darkness builds, flips, and clears — a three-angel game with two oppressed saints.
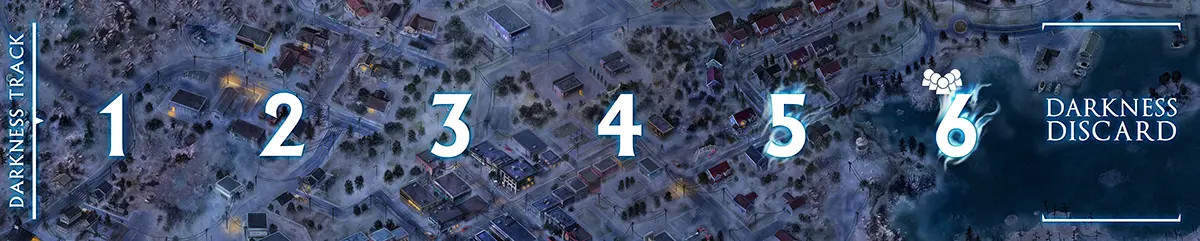
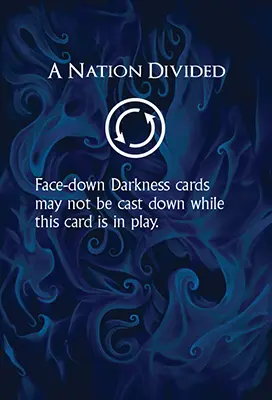
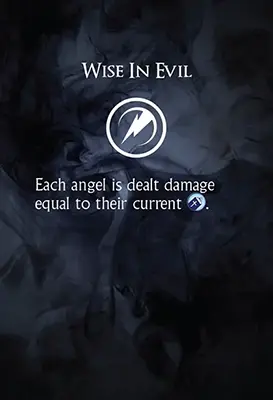
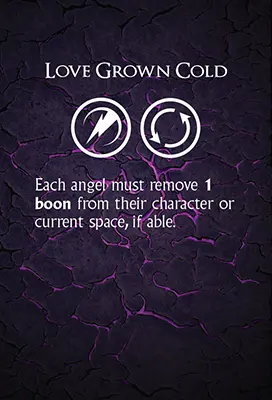
Round 1: Three angels, so three Darkness cards go face-down. Oppressed saints add none — that step is skipped in the first round of a battle.
Round 2: Five Darkness cards are owed — three for the angels, two for the oppressed saints. Only two spaces are open, so two go down and the track is full; with fewer than five angels the sixth slot stays out of play.
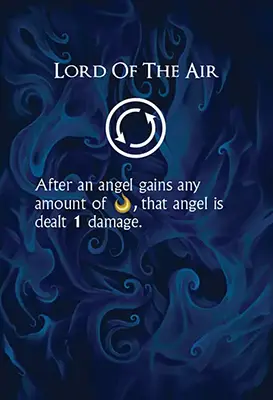
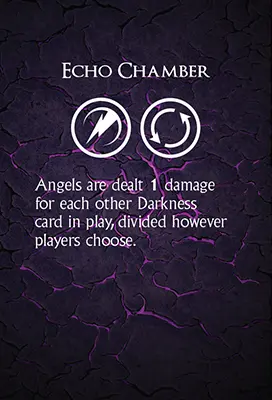
Round 2: Three cards are still owed and there is nowhere to put them, so face-down cards are flipped face-up instead, left to right. Cards with only passive icons go into effect immediately. Cards with both passive and activate icons trigger once per round and stay in play.
Round 3: Five Darkness cards are owed again. The last two face-down cards flip, and three are still owed with none left to turn — so each angel is dealt 3 damage.
Then each card with activate fires left to right.
Round 3: Face-up cards without a passive icon are discarded, and the rest slide left to close the gap. The passives stay until cast down.
Darkness Board
The Darkness board is the game’s own play area, holding the decks, tracks, and discards that drive the Forces of Darkness.
Darkness deck. Draw Darkness cards from here each Darkness phase.
Prince deck. While any Prince Darkness cards are staged, draw one in place of the first normal Darkness card each Darkness phase.
Darkness track. Placed Darkness cards fill these slots. If it fills, Darkness quickly overwhelms the angels. The 6th Darkness slot is only used in 5-angel games.
Darkness discard. Cast-down and resolved Darkness cards go here.
Battle deck. Draw Battle cards from here to stage new demons.
Initiative Track. One Battle card per demon type, setting the demons’ turn order.
Battle discard. Spent Battle cards go here.
-
Round & XP Track. One numbered track, with a token apiece for the round and the group’s experience.
Round & XP Track. One numbered track. Only the round token is used in a campaign — experience comes as end-of-mission rewards instead.
Darkness Cards
Darkness cards represent the evils of the mortal world and their effect in the supernatural realm. During the Darkness phase, they are placed on the Darkness track and, over the course of the game, turned face-up and activated — unless they are cast down.

Darkness track and cards
- activate only: it activates once, then is discarded.
- passive only: it adds an ongoing passive effect, active immediately, that remains in play until cast down.
- activate and passive: it activates but is not discarded, and activates again each round until cast down.
- stronghold: it is a Stronghold and cannot be cast down or otherwise removed by angels.
Darkness Phase
-
For each angel, place 1 Darkness card face-down on the next open space on the Darkness track.
While any Prince Darkness cards are staged, draw one in place of the first normal Darkness card.
Add 1 more Darkness card for each oppressed saint on the battlefield. Skip this step in the first round of each battle.
If the Darkness track is full when more cards must be drawn, flip face-down cards. If all are face-up, angels take damage (see below).
Cards with passive effects are active immediately. Resolve each face-up card that shows an activate icon from left to right, then discard any that don’t show . Slide the remaining cards left to close any gaps.
See how Darkness might progress over three rounds
Full Darkness track
The total number of Darkness cards in play may never exceed the open spaces on the Darkness track.
If you must draw additional Darkness cards when the Darkness track is full, instead flip one face-down card face-up — left to right — for each card you would have drawn.
If all the spaces on the Darkness track are full with face-up cards, each angel suffers 1 damage for each additional Darkness card that was to be drawn.
Prince Darkness cards are always placed on a full track.
- They’re placed face-up — immediately active.
- Discard and replace the leftmost face-down Darkness card.
- If none are face-down, discard and replace the leftmost face-up non-Prince Darkness card.
- Each angel is dealt 1 damage for each Darkness card discarded this way.
Defeat
A character is defeated when the damage on it reaches its maximum health. What follows depends on the character.
Demons. A defeated demon is finished — remove its standee from the battlefield and discard its tokens. Once the last of a type is defeated, remove its Battle card from the initiative track as well. Leave the type’s character board and Talents set up, though — more demons of that type may yet return to the battle.
Angels. A defeated angel isn’t gone. Remove them from the battlefield and clear all their status effects, but they keep their damage, Courage, Talents, Heavenly Treasure, and Prayer cards.
They still take their turns, but may act only through a Pray action, Prayer cards, and Heavenly Treasures marked interrupt or with a one-time equip effect. Their character-board and Talent skills are unavailable, as is any Heavenly Treasure with a passive effect.
A defeated angel ignores negative effects and can’t gain boons or Shield, though they may still gain Courage or bonuses to tests.
Demons
The Forces of Darkness — the Fallen Princes and their minions — are controlled by the game itself. Each demon acts from its character board, read the same way whether it is a minion or a Fallen Prince.
-
Health. Each demon’s Health is tracked individually. Deal damage equal to this value and the demon is defeated — remove its standee and discard any tokens on it.
Like a Fallen Prince, a Lieutenant’s health scales with the party. Two angels use the printed base; three or four angels add the value beside the matching angel-count icon, and five angels add both.
A Fallen Prince’s health scales with the party. Two angels use the printed base; three or four angels add the value beside the matching angel-count icon, and five angels add both. For example, Herod’s printed 35 health rises to 49 with three angels (+14), 63 with four (+28), or 77 with five (+14 and +28).
Talents. Slots for equipped Talent cards, which add Health and special skills — more of them at higher difficultiesdifficulties. Resolve these first, top to bottom.
-
Activated skills. Marked with the activate icon and listed first. Resolve them after any equipped Talents but before rolling for actions.
Note: Some demons have a special rule in place of an activated skill, which is to be taken into account while the demon is in play. Read these carefully, as these special rules may affect their actions.
-
Skill tree. The demon’s menu of actions. On its type’s turn, roll one 6-sided die and match the result to the numbered branch; every demon of that type takes that action, one at a time — minions in number order.
Extra actions. If a demon gains another action from any source, roll again for it — once per extra action — and follow its skill tree for each roll. An extra action belongs to that one demon, not the rest of its type; it never triggers activated skills, and it does not count as another turn.
Token area. An area for damage, shield, and status effect tokens. For demon groups, marked sections match the labels on their standees.
-
Experience. The XP the group gains when this minion is defeated.
Experience. Angels do not gain group experience during a campaign — XP comes as end-of-mission rewards instead.
Skirmish Difficulty
A skirmish scales up for players who want more of a challenge — from newcomers ready to step up to grizzled veterans. Raise the difficulty as soon as you know the game.
To make a skirmish harder, deal Demon Talents to your foes: shuffle and randomly deal the Talent(s) into the marked spaces beside each demon card, repeating for any new demon type that enters play. If angels gain levels during setup, do so after the first battle’s Talents are dealt. Raise the level by the guidelines below:
| First-battle demons |
Final Battle demons |
Final Battle Fallen Prince |
Starting angel levels |
|
|---|---|---|---|---|
| Adventure | — | — | — | 0 |
| Heroic | 1 Minor Talent | 1 Major Talent | 1 Prince Talent | 1 |
| Nightmare | 2 Minor Talents | 2 Major Talents | 2 Prince Talents | 2 |
| Abyssal | 2 Major Talents | 2 Major Talents | 3 Prince Talents | 3 |
| Infernal | 2 Major Talents | 2 Major Talents | 3 Prince Talents | 2 |
Mission Difficulty
Missions scale up on their own: difficulty rises naturally as a campaign story unfolds. Scenarios are rated 1–5 dots in the scenario book so you can pick your level.
Challenges. For a steeper test, play any mission under its Challenge rules — a harder version of a mission, meant for angels at full strength.
Every campaign mission has one. Try a Challenge whenever you like, though they fit best after a full campaign at normal difficulty. Completing one earns 1 XP, so clearing them all is major advancement for an angel.
Effects
An effect is anything a skill or a card does. Skills are the effects listed on a character board or Talent card; the rest are the effects on Darkness, Heavenly Treasure, and Prayer cards.
Effect icons. Every effect includes one that determines when and how it is used:
Using effects. An effect may cost an action, Courage, or both; pay the cost before it activates. On their turn, an angel may use their effects in any order — including ones already used — as long as they can pay each cost, unless an effect states otherwise.
Resolving. An effect’s parts resolve in the order written; perform every one unless it says “you may.”
Demon Engagement
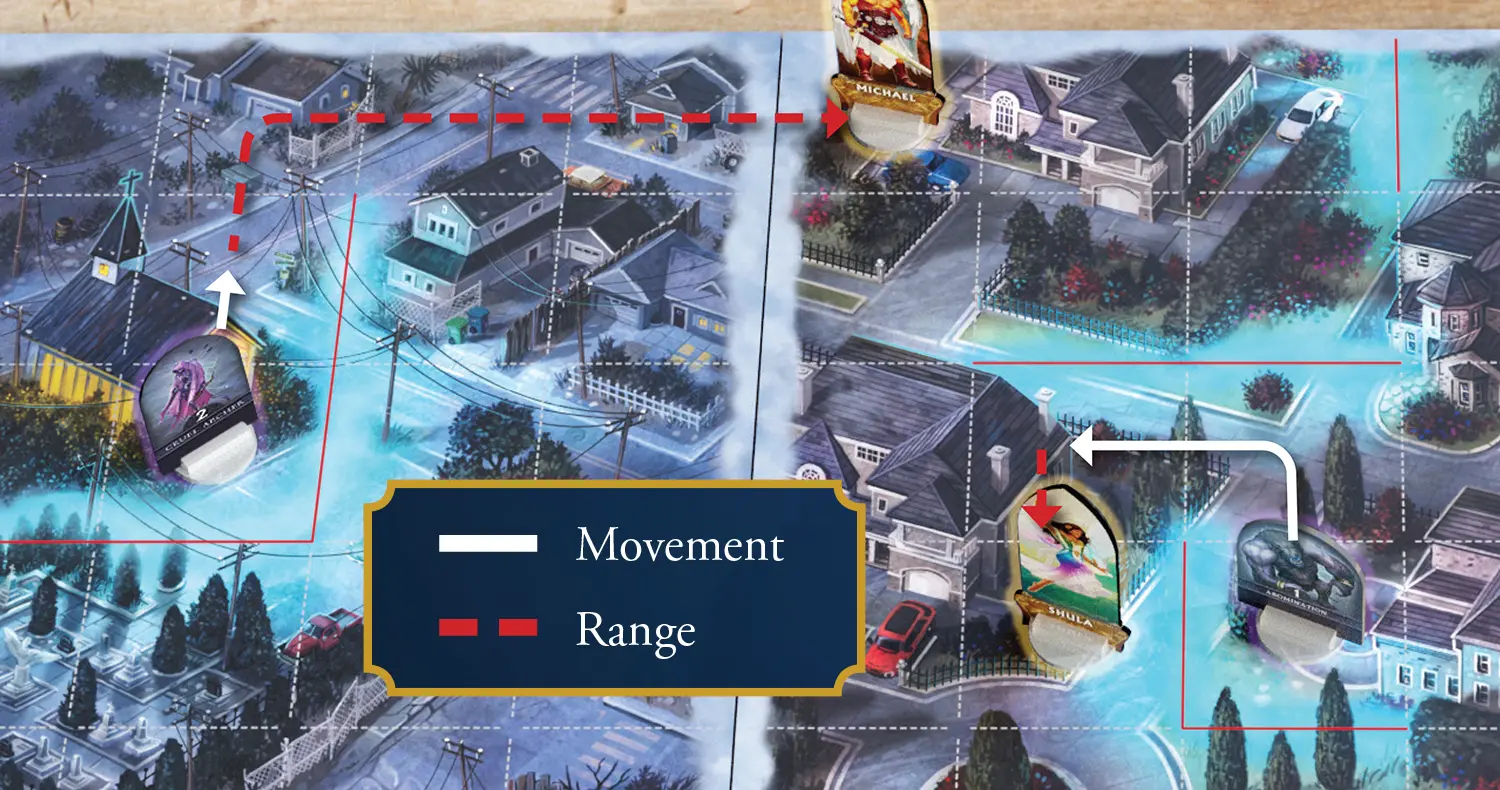
Because the game moves the demons, each combat skill spells out how to close on its target. Most list a Move value — how many spaces the demon may travel — and a Range value — how near it must be to strike. The skill then uses one of two words to say how that Move is spent.
Engage. The demon advances toward its target and stops the instant it is within Range. If it already stands within Range, it does not move at all.
Move toward. The demon spends its whole Move closing on the target, drawing as near as it can even when it is already within Range.
Either way the demon takes the shortest path and never moves diagonally, and if the target is still out of Range once it has moved, its action ends.
-
![Volley [Range 4, Move 2]: Cruel Archer engages the nearest angel and deals 2 damage. Other angels within 2 range of that target are dealt 1 damage.](/figs/engagement-volley.webp)
Engage. One space is all the Cruel Archer needs to bring Michael within Range, so it stops there and attacks — well short of its full Move.
-
![Tremor [Range ∞, Move 5]: Move toward the nearest angel, then target all spaces in a straight line in each direction (ignoring barriers). Each angel on those spaces is dealt 4 damage.](/figs/engagement-tremor.webp)
Move toward. Tremor’s infinite Range already reaches Shula through the barrier, but move toward still sends the Abomination its full Move to close in as near as it can before striking.
Events
Events are chaotic happenings the angels must overcome — reinforcements arriving, the battlefield turning against them. A mission that uses them prints an event chart, read against the round you are on.
Resolving them. Events happen in the Refresh phase. Advance the round, then read the mission’s event chart: if a row matches the new round, that event activates. Nothing happens on a round the chart doesn’t list.
Reading the chart. Each row is a round and each column an angel count, so an event scales with the size of the party. Take the cell where the current round meets the number of angels in the game — only that cell. A gold box above the chart carries anything the cells can’t, most often where to place the demons it brings.
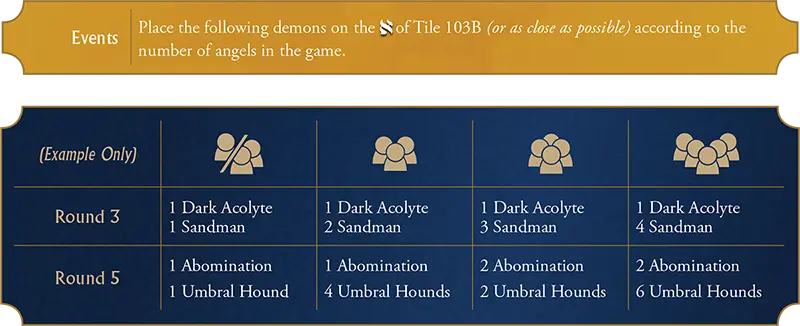
In a three-angel game, the Refresh phase of round 3 brings in 1 Dark Acolyte and 2 Sandman, placed on the of tile 103B. A four-angel game reads the next column along — 3 Sandman instead of 2.
Group Experience & Leveling Up
Angels earn experience (XP) by defeating demons: a demon defeated by any means grants XP equal to the value on its character board, also printed on its Battle card. The group pools this as Group Experience.
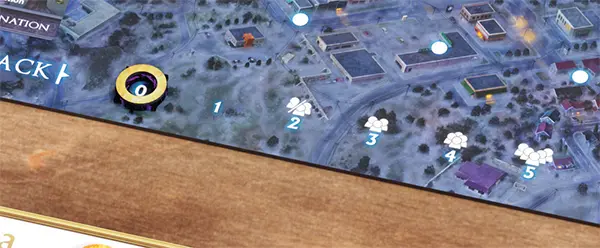
The Group Experience marker on the XP track.
Leveling up. During the Level-Up phase, if Group Experience is at least the number of angels, every angel levels up at once. Reduce the tracker by that number, then each angel takes one reward: reveal 2 Talent cards and keep 1, or draw 2 Heavenly Treasure cards and keep 1. If enough experience remains to level again, do so — gain as many levels as possible before the next round.
Higher difficulty. On harder settings, angels may start the game already leveled up. Take those level-ups during setup, the same way.
Campaign XP & Tracking
In a campaign, angels keep what they earn from one mission to the next, recorded on a campaign tracking sheet — one sheet per angel. Everything unlocked, equipped, and owed is written there.
Each campaign has its own sheet, and they are not interchangeable — use the one that matches the campaign you are playing.
Angels earn XP only as an end-of-mission reward, listed in the mission’s gold box. Defeating a demon grants nothing. Apply the reward as soon as the mission is won.
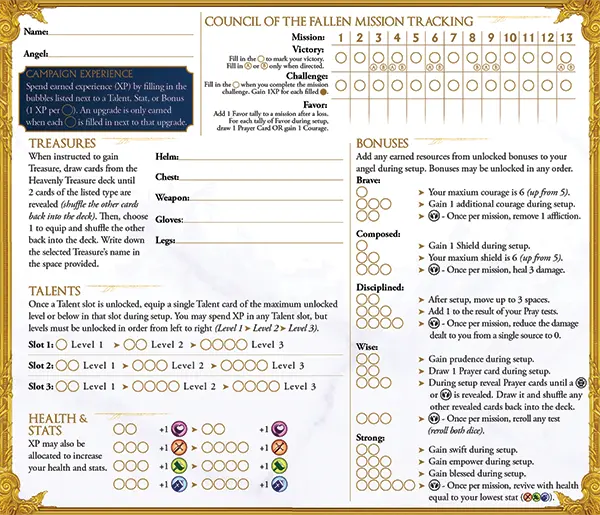
Missions. A column per mission. Mark each victory, add a mark to a mission’s Favor box each time you lose it, and fill the Challenge bubble when you clear that mission’s Challenge — each one worth 1 XP.
Some missions branch. Where a column shows Ⓐ and Ⓑ bubbles, fill the one the book names to record the path you took.
Campaign experience. Fill in one bubble per XP, next to whichever Talent slot or Bonus you want. The bubbles beside an entry are its cost, and nothing is gained until every one to its left is filled — a partly-filled row grants nothing yet. Spend on Bonuses in any order; Talent slots must unlock in level order, 1 then 2 then 3.
Treasures. A Treasure reward names an item slot — weapon, helm, chest, gloves, or legs. Reveal Heavenly Treasure cards until 2 of that type appear, keep 1, and shuffle the rest back. Write it in the slot; the angel starts every later mission with it equipped.
Talents. Three slots, each unlocked separately. A slot holds one Talent card of its unlocked level or lower, so a level-3 slot may still take a level-1 Talent, and two slots may hold Talents of the same level. Re-pick before any mission attempt — swapping Talents is the surest way to beat a mission that beat you.
-
Bonuses. Permanent improvements, applied at the start of each later mission right after setup. Each has more than one tier, bought a bubble at a time:
Wise — a fuller hand of Prayer cards from the first round.
Strong — boons already in play when the mission begins.
Stats — permanent increases to the stats an angel’s skills scale from.
Every track ends in an interrupt — a power its own bonus describes, usable once per mission.
Health & stats. XP also buys health and stat increases, each in two steps. The first step costs less than the second.
FAQ
How do actions containing “repeat” work?
Skills and abilities that repeat include the first use in the total number of “repeats” that may be performed. Players may elect to repeat an angel’s action fewer times than allowed, but skills repeated by demons may not be reduced. If Azrael has 5 Strength, for example, he may use Final Plague up to 5 times in total.
What if I use up all tokens of a particular status effect and am instructed to place another?
Tokens that are placed on characters (angels or demons) are meant to be unlimited in supply. Though enough tokens have been provided to cover the vast majority of cases, if all copies of a token (e.g. wither or empower) are in use and another should be placed, use an action token or proxy to represent this additional status effect. Tokens that are placed on the battlefield are different — when instructed to place a status effect on the battlefield (e.g. light or shadow) and all are in use, remove the furthest status effect token from any angel on the battlefield and use it.
What does it mean to “move” vs “swap/put/place” something?
How do bonus damage, bonus movement, and other “added” effects work?
When you are instructed to “add” or grant a bonus to a skill, card, or other effect (e.g. bonus damage from empower, add X bonus damage, or add X bonus healing), this is not a separate instance of damage/healing/etc., but merely an addition to an existing effect.
How do Heavenly Treasure cards with “Use once” work in the campaign?
Heavenly Treasure cards marked “Use once” may be used once per mission attempt. For example, if a mission is failed, players may still use this item again during each subsequent mission attempt.
How do Heavenly Treasure cards with “ When equipped:” activate if you gain it during setup or the rewards section (e.g., in the campaign or when you gain them between battles in skirmish)?
These cards activate immediately after a battle staging is complete (after demons, saints, and angels have been placed). Therefore, an item such as Guardian’s Helm would always allow you to protect an oppressed saint.
When using a skill, can I choose not to execute a test or other positive effect if I am concerned about triggering a more damaging negative effect?
Players must always perform all parts of the skill or card they choose to use unless the skill says “you may.” For example, if you use a Pray action, you must spend an action, gain Courage, draw a Prayer card, and perform the Pray test. You must perform each part of the Pray action even if you would take damage from gaining Courage, failing the Pray test, or some otherwise detrimental effect that is in play. Conversely, if you are playing Azrael and use the Captive Fumes skill, it says “That angel may test 7+.” This allows the angel that Captive Fumes is targeting to choose not to test, should they wish to avoid a negative effect such as cursed.
Favor
Favor is a blessing from Heaven, granted to angels who face a trial that has already beaten them once. A lost mission is not wasted — the angels return to it stronger.
Earning it. Lose a campaign mission and mark 1 Favor in that mission’s box on the campaign tracking sheet. Lose it again and add another mark, and so on — every game lost makes the next attempt a little easier.
Spending it. During mission setup, each angel gains 1 Courage or 1 Prayer card per point of Favor, split however they like. The usual Courage limit and hand limit still apply, so an angel starting with more than 5 Prayer cards discards down to 5 before the first round.
One mission only. Favor belongs to the mission that earned it and does not add to any that follow. A Challenge always begins at 0, and losing one earns no Favor.
Free Action
A free action is considered to be an action — except that you do not need to use an action token to activate it. You must still pay any other associated costs.
A skill or card marked may only be used during the angel’s turn, or when an effect grants an extra action to use.
In addition, a free action may break a tie when angels act simultaneously in a 4–5 player game.
Game Modes
There are three ways to play Deliverance — the story-driven campaign, standalone skirmish, and one-shot scenarios. To learn at a relaxed pace, new players can start with campaign missions 1–4, each of which spotlights a different part of the game.
Campaign. A story that unfolds over a series of missions, following the angels through the Valley of the Shadow of Death. Play them in order, each by the campaign book’s instructions and victory conditions — and don’t read ahead, to keep the story unspoiled. Leave any sealed box sealed until the book tells you to open it; afterward its contents can go back in the box, or join your components for skirmish play.
Skirmish. Battle the demonic hordes and protect the saints across two back-to-back battles, then cast your Fallen adversary into the abyss. You win by defeating all demons in the final battle — the Fallen Prince included.
Scenarios. Thematic one-shot missions — a short story with special rules, played at skirmish pace. Pick one by difficulty and follow the scenario book’s instructions and victory conditions.
Golden Rules
Where instructions disagree, the first of these that applies wins:
- A mission’s instructions
- A card’s text
- The general rules
If the rules are ever unclear, read them the way that makes the game most fun. If players disagree, cast a tiebreaker roll — highest roll wins.
Health
Health is the most damage a character can sustain before being defeated. Angels and demons both have it.
Maximum and current health. Maximum health is the value on a character’s board plus any bonuses; current health is that maximum minus the damage on them.
Defeat. When damage reaches maximum health, the character is defeated. A demon is removed from play; an angel is removed from the battlefield but stays in the game, and can be revived.
Raising maximum health. An angel’s maximum health starts at their board’s base value and rises by 1 for each Health stat icon gained through leveling upleveling up, Talents, and Heavenly Treasures.
A demon’s health is set on its character board — raised by Demon Talents, and for a Fallen Prince or Lieutenant, scaled by the number of angels.
Iconography
 Courage
Initiative
Initiative sets the turn order each round — the angels by a token they pass among themselves, the demons by a track of Battle cards.
Angel Initiative token
Angel initiative. One angel holds the Angel Initiative token, marking who acts first; play then runs clockwise from there. The token stays put through the round and moves to a new first angel at the start of the next. Its holder also settles ties — when the group can’t agree on the order to resolve simultaneous effects, the token-holder decides, and “Initiative order” is always counted clockwise from the token.
Demon initiative. The demons act along the Initiative Track: one Battle card per demon type, laid out in the order the cards were revealed, with any Fallen Prince last. Duplicate Battle cards are discarded — a demon type needs only one card. On each demon turn, the leftmost type whose action token is still gold-side up takes its turn, and every demon of that type acts together.
A new demon type that joins the battlefield sits out the rest of the round: place its Battle card at the end of the Initiative Track, action token grey-side up (exhausted). A single demon entering a type already in play is the exception — it acts on that type’s turn as usual.
A defeated demon type leaves the Initiative Track: remove its Battle card and slide the rest left. If a type is wiped out before it acts, the next type takes that turn before the next angel — angels never act twice in a row while a demon still has a turn (except under 4- and 5-player simultaneous play). Leave the type’s character board and Talents in place, though; more of that type may yet enter play.
Interrupt
An interrupt may be used at any time — including outside your turn — or under the specific condition its skill or card text describes.
An interrupt is not an action: it needs no action token, though you must still pay any other listed costs.
Level-Up Phase
There is no Level-Up phase in a campaign — angels gain XP only between missions, recorded on the campaign tracking sheet.
-
If the Group Experience tracker holds an amount equal to or greater than the number of angels, each angel gains a level. Reduce the tracker by that amount, then for each angel choose one:
-
Gain a Talent: draw 2 cards from your lowest-level face-down Talent deck, choose 1, shuffle the other back, and place the chosen card face-up on top of the deck.
-
Gain a Heavenly Treasure: draw 2 cards, equip 1, and discard the other. Any stat bonuses ( ) on the card permanently increase your angel’s stats.
-
If enough experience is stored to level more than once, repeat until all possible levels are gained.
Return to the Refresh phase and begin another round.
Lieutenants
Lieutenants are named minions — foes who carry out the will of the Fallen Princes, with skills of their own and far more health than the rank and file. The strongest can rival their masters. A mission brings one into play by name, such as Og, King of Bashan.
Character board. A Lieutenant’s board is printed in the mission text, so keep those pages open — you’ll be reading its skills all battle. Damage, Shield, and status effect tokens go straight onto the printed board.
Standee. A Lieutenant has no standee of its own. The mission names a minion type close enough to stand in for it — an Abomination for Og, a Fallen Seraph for Droxael.
Health. Unlike the minions around it, a Lieutenant’s health scales with the number of angels — the same way a Fallen Prince’s does.
Talents. Lieutenants take Demon Talents like any other minion, noted in the mission’s Initiative Track section. Lay the cards next to the character board printed in the mission text.
Map Tiles
Map tile 107A
Map tiles form the battlefield the angels fight across. Each is double-sided, with an A face and a B face, and tiles connect edge to edge in any orthogonal orientation. Tile 110 — the Heavenly Gates — anchors every battlefield, and the rest are assembled around it at setup.
Spaces. A dashed grid divides each tile into square spaces — the unit the battlefield is measured in. A character stands on one space at a time; saints and loose tokens sit on a space without blocking it. Where two tiles meet, the spaces along the seam are adjacent, so the map counts as one continuous grid.
Barrier
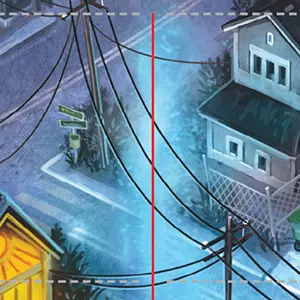
Barriers. Where the line between two spaces runs red instead of dashed white, a barrier stands there — a bank of glowing mist in the terrain beneath the grid. A barrier blocks movement, adjacency, and targeting across that edge, and paths trace around it. Some skills ignore barriers and say so.
Space markers. , , and mark three spaces on every tile face. A Battle card names the markers its demon and saint are staged on. The letters are shared coordinates rather than a matching set: a card is drawn at random for a tile and staged on whichever spaces it names.
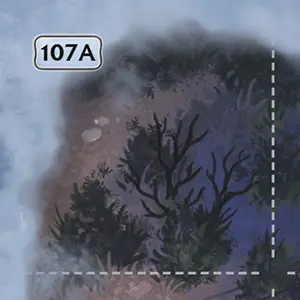
Tile number
Tile numbers. Each face carries its number in the top-left corner, the letter marking which side is up — 107A and 107B are the two faces of one tile. Missions name the tile and face to place, and the campaign book enlarges the number so you can read it off the battlefield picture.
Tile 110, the Heavenly Gates
The Heavenly Gates. Tile 110 is the angels’ bastion and the anchor the rest of the battlefield connects to. Marked spaces on its face hold the Prayer and Heavenly Treasure decks and their discard piles, and the treasure an angel passes over is discarded face-up there.
Angels deploy on the Heavenly Gates at setup and revive on it when defeated. It is never flipped, even when the rest of the battlefield is turned over to save table space.
Angels deploy and revive on the starting spaces the mission marks rather than on the Heavenly Gates, but the tile still holds the decks, and the mission names the face and orientation to place it on.
Movement
All angels and most demons have a Move skill (or a skill that also shows Move). The number is the most spaces that character may move as part of the action. Movement is orthogonal — up, down, left, or right, not diagonal — and barriers block movement between two spaces.
Occupied spaces. A moving character may pass through any other character, but may not stop on a space occupied by the opposing side. Stopping on a space occupied by an ally forces that ally aside: angels fall back, demons fall forward (see below). If that ally can’t move — due to an affliction or other effect — the space stays blocked, and no one may stop there.
Saints and other tokens on the battlefield don’t block movement.
Adjacent means a character’s own space and the four spaces directly above, below, left, and right of it — not diagonal. The blue barriers that block movement also block adjacency.
Mystery Components
Deliverance keeps some of its contents sealed — mysteries the angels uncover during a campaign. Leave them sealed until the campaign book directs you to open one, and consult that book for what to do with what you find.
What they hold. A mystery might bring divine aid to angels up against insurmountable odds, or set a final Challenge to test them at full power. Once opened, its contents may go back in the box, or join your components for skirmish play.
Mystery Foil Pack. Council of the Fallen adds a pack that opens on achievement rather than instruction: finish its campaign, clear level 4 of Expeditions in the scenario book, or lose three games of any kind. Its instructions are inside.
Overview
Deliverance is a cooperative adventure pitting the angelic host against their demonic enemies. A skirmish runs two back-to-back battles, the second against a Fallen Prince.
Deliverance is a cooperative adventure pitting the angelic host against their demonic enemies. The campaign plays out mission by mission, and angels keep what they earn from one to the next.
Deliverance is a cooperative adventure pitting the angelic host against their demonic enemies. A scenario is a single mission with its own special rules, played at skirmish pace.
Rounds. Angels and demons take turns one at a time, alternating between the two sides. On their turn, an angel spends actions to move and use their skills. When everyone has acted, the round ends and the next begins.
Win by defeating every demon in the Final Battle — the Fallen Prince included.
Win each mission by meeting the victory conditions it lists.
Win by meeting the victory conditions the mission lists.
Lose if all angels and allies are defeated in battle, or if the round tracker reaches 6 in the first battle with a demon still in play — the Fallen Prince escapes.
Lose if all angels and allies are defeated in battle, or on any losing condition the mission sets.
1–5 players · Ages 14+ · 1–2 hours
Passive
A passive is an ongoing effect: it is always in play, or it triggers whenever its stated condition is met — no action required. Status effects (boons and afflictions) are passive, as are many character-board, Talent, and Heavenly Treasure effects.
4 & 5 Players
Deliverance supports up to five players. In 4- and 5-player games, two players take their turns at the same time — simultaneous play — to keep the game moving instead of waiting for each player to act one by one. They spend their actions in any order, whether truly at once or traded back and forth. A few standard rules change to make room for it.
Turn order. Each Action phase runs like this:
- The first two players act together — give one the Initiative token; that player and the player clockwise from them take their turns at once.
- The first two demon types act, one after another.
- The next two players act together.
- The next two demon types act.
- In a five-player game, the last player acts.
- Any remaining demon types act, until every demon has gone.
Five-player games. A fifth player also brings the sixth slot on the Darkness track into play, and a Fallen Prince adds both its 3- and 4-player health values to its base — e.g. Antiochus reaches 86 health (39 + 16 + 31).
Tiebreakers. When two players acting together want the same thing, break the tie in this order:
- The player who has lost more tiebreakers this round wins.
- Otherwise, whoever has used fewer actions this round.
- Otherwise, a player using an interrupt.
- Otherwise, a player using a free action.
- Otherwise — both using the same type — roll off, or, if your group prefers, let the player earliest in Initiative order (clockwise from the token) win.
The winner resolves their skill, then simultaneous play resumes — the other player may rethink their plan in light of the result.
Prayer Cards
Prayer cards provide divine intervention for angels. They’re public — any player may view and discuss them — but only their holder may play them. A Prayer card has unlimited range unless it says otherwise.
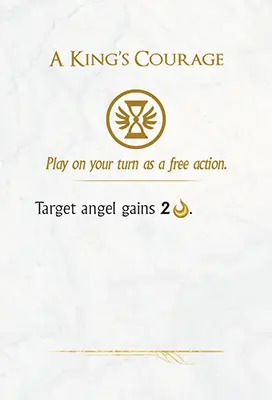
Prayer card
Drawing. Draw a Prayer card from the Prayer deck with each Pray skill you use, or from other skills and card effects. Discard a Prayer card to the Prayer discard pile after one use.
Playing. A card’s icon sets when you may play it:
- action — play it on your turn as an action.
- free action — play it on your turn as a free action.
- interrupt — play it at any time, even outside your turn; if the card names a condition, only when that condition is met.
Like all effects, Prayers are resolved in the order written, all extra costs must be paid, and extra actions must be used immediately.
Hand limit. An angel may hold at most 5 Prayer cards. Hold more and you must immediately reduce to 5, by playing an interrupt card or discarding.
Prince Darkness Cards
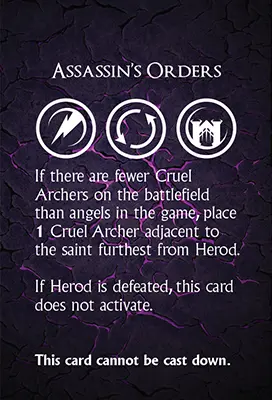
Prince Darkness card
Prince cards are a special kind of Darkness card, tied to a given Fallen Prince battle. Their deck is staged when the Fallen Prince enters play — during the final-battle setup.
Each Darkness phase, draw 1 Prince card in place of the first normal Darkness card, until no Prince cards remain — even if the Prince has been defeated.
Prince cards always enter play face-up and immediately active, so a Prince card with an activate icon resolves the turn it is revealed. Some alter how later Prince or Darkness cards are drawn — read them closely.
Many Prince cards are strongholds — they cannot be cast down and stay in play until all demons are defeated, unless noted otherwise.
Range & Targeting
Range is the most spaces you may count from a character to select a valid target. It’s listed next to a skill — for angels, minions, and Fallen Princes alike; a range of infinite (∞) means every eligible target is in range.
Range example
Counting range. Count the shortest path from the character to its target, one space at a time — never diagonally, through a veil token, or through a barrier. Other characters don’t block the count, so a path may run straight through them. The target is in range if that path is no longer than the range value.
When range isn’t listed, the skill describes it in its text — “within 2 range,” “an adjacent space.” Ranges given as a specific value, such as “exactly 3 spaces” or “on or adjacent,” can’t be modified by skills or cards.
Targeting. A target must lie within the skill’s range. When a skill also includes movement, you may move up to its full value before selecting a target — e.g. Mighty Smite: “Move up to 3 spaces, then deal damage to an adjacent demon.” A demon has no such choice — its skill says whether it engages or moves toward its target.
A skill or card lists its valid targets — cards, characters, saints, spaces, and more. If a skill may select several targets, determine all valid targets before resolving the rest of it. Barriers that block movement and adjacency also block targeting.
Choosing a demon’s target. When a demon has several valid targets at equal range, or its skill doesn’t name one, the players choose for it. If they can’t agree, roll off — the highest roll decides.
Refresh Phase
Increase the Round by 1 (move the round tracker up one space on the Round & XP Track).
Resolve events, if any. When a mission’s event chart lists the round you just moved to, resolve the entry for the number of angels in the game.
Refresh all spent action tokens — on angel character boards and on Battle cards — by turning them gold-side up.
Revival
A defeated angel can be revived — by a card effect, a Pray action, or even by reviving themselves.
A revived angel returns with 1 health remaining, regardless of their maximum health, and may once again use all available actions.
Place them on any space on the Heavenly Gates tile.
Place them on an unoccupied starting space.
Round Order
To play a round of Deliverance, complete each step in the order below.
Round Tracker
Refresh Phase
- Increase the Round by 1 (move the round tracker up one space on the Round & XP Track).
- Resolve events (if any).
- Refresh action tokens.
Darkness Phase
- Place 1 Darkness card per angel.
- Place 1 Darkness card per oppressed saint (skip on first round).
- Resolve each face-up card with from left to right, then discard unless they contain (complete card placement and excess damage before activation).
Action Phase
- Choose an angel to act first and give them the Angel Initiative token.
- Alternate turns between angels and demons until all angels and demons have acted. (Angels act in clockwise order. Demons act in Battle card order on the Initiative Track.)
Level-Up Phase
If Group Experience is at least the number of angels, every angel levels up. Reduce the tracker by that amount, then each angel gains a Talent or Heavenly Treasure card (reveal 2 cards of the chosen type, then choose 1 to equip).
If the victory condition is not met, begin another round starting at the Refresh phase.
Saints
Saints are humans of special significance in the spiritual realm. As an angel of light, your standing order is to guard and assist them. They cannot see or hear you, but they are drawn to your presence. Like demons, saints are controlled by the game.
Oppressed
Setup. Battle cards mark where saints start. During setup, place a saint token on each marked space, blue oppressed side up. A saint may share its space with an angel, demon, or other saint.
Oppressed. Saints begin each battle oppressed (blue side up). During the Darkness phase, oppressed saints cause players to draw more Darkness cards.
Protected
Protecting. To overcome the Darkness, angels must protect saints. When an angel ends their movement on or adjacent to an oppressed saint, immediately flip that saint to its protected (gold) side. When a demon ends its movement on or adjacent to a protected saint, flip it back to oppressed (blue). Remember: blue barriers block adjacency.
Contested. If an angel or demon is already on or adjacent to a saint’s space when an opposing force moves in, the saint is contested and does not flip. As soon as one of them is defeated or moves out of adjacency, flip the saint to its appropriate side.
Skirmish Setup
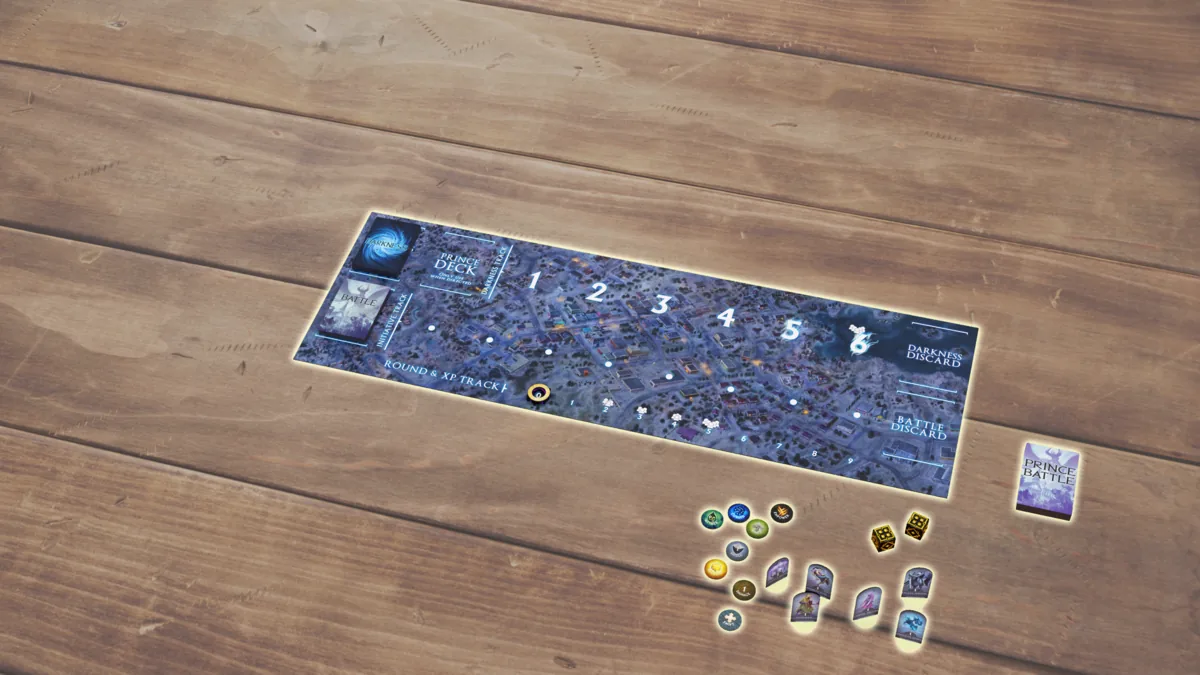
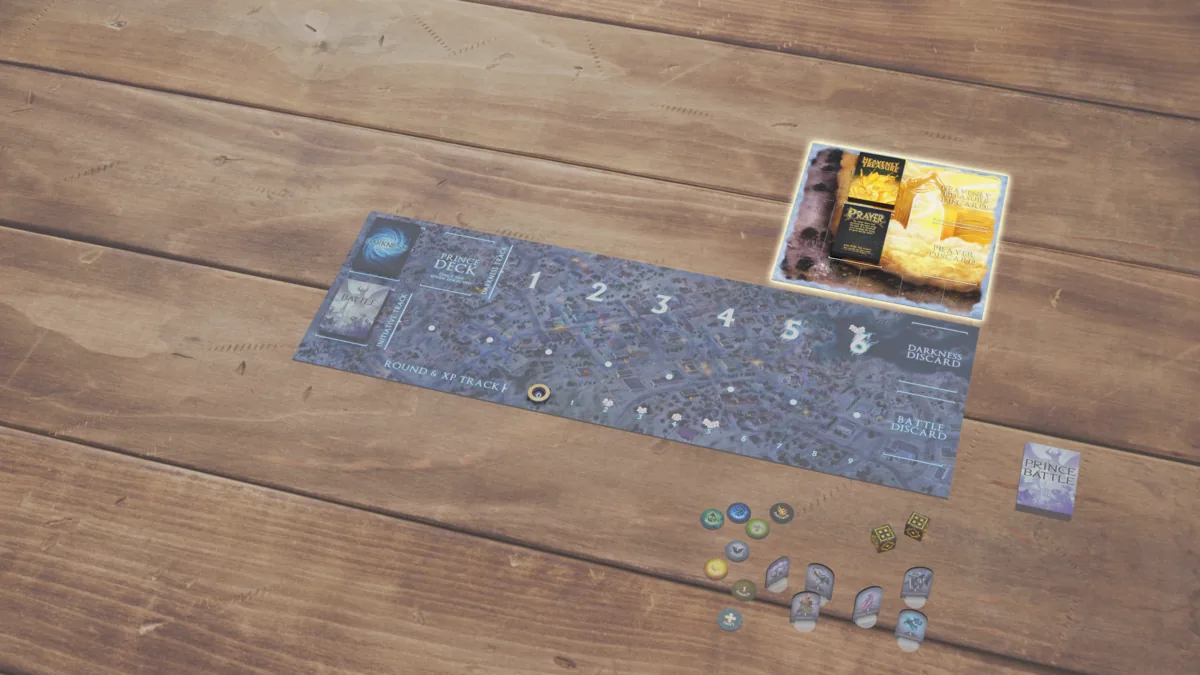
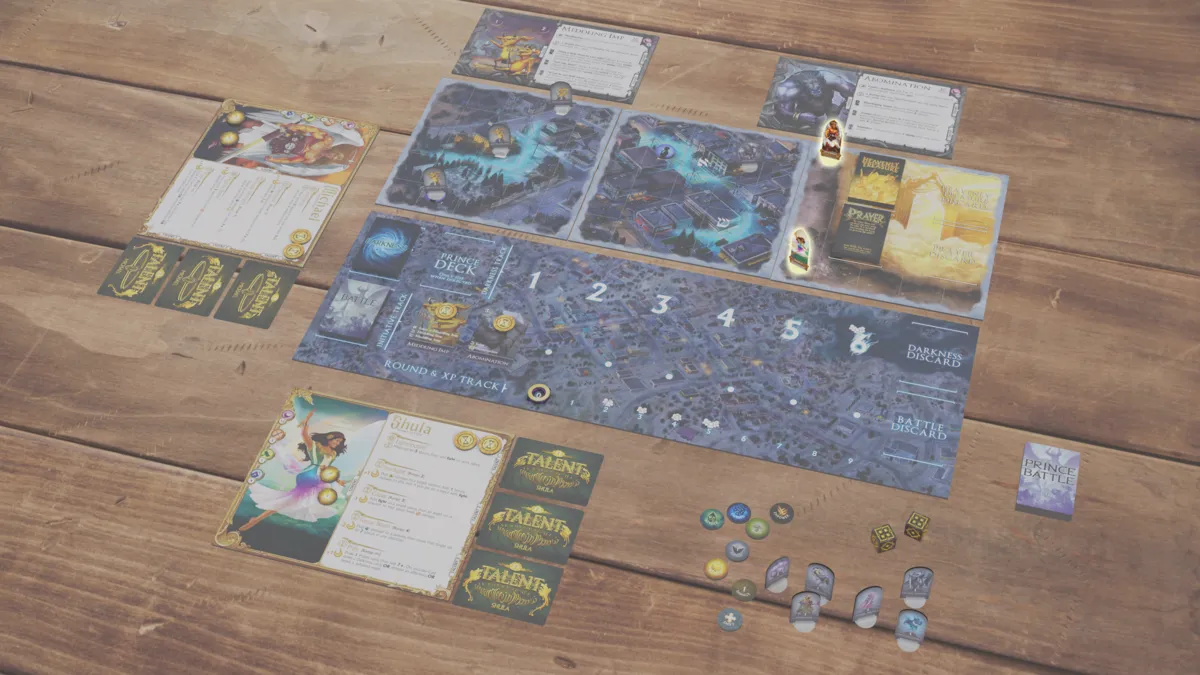
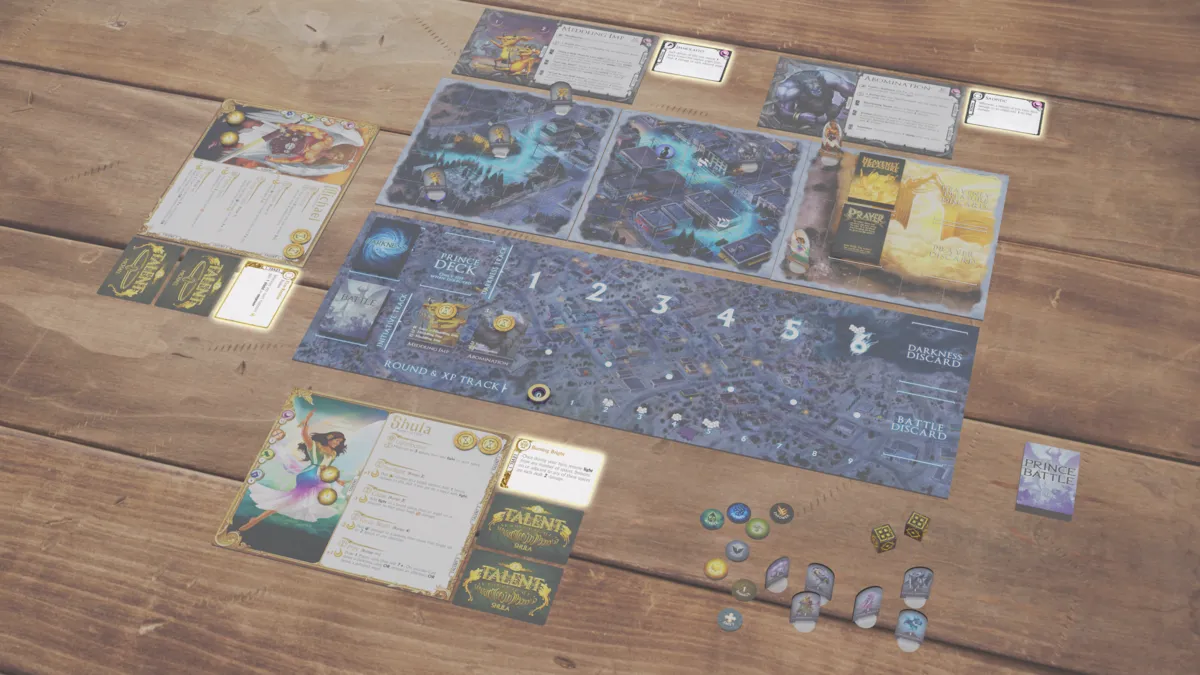
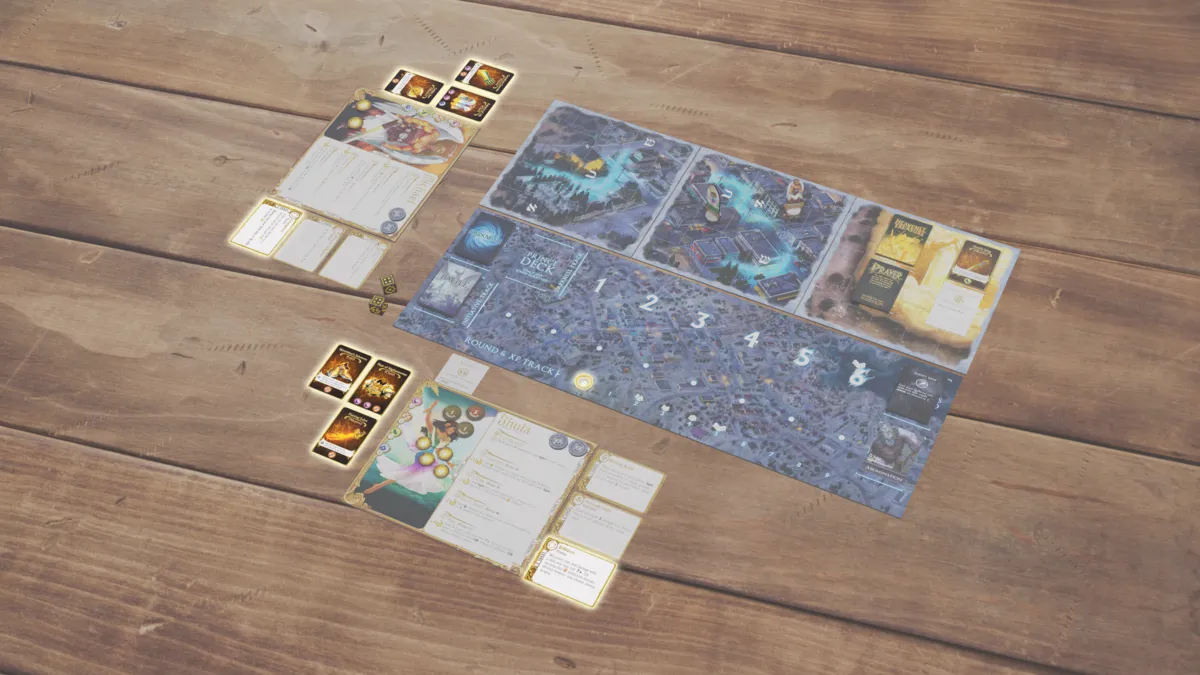
Darkness gathers. Place the Darkness board — the seat of the Forces of Darkness. Shuffle the Darkness and Battle decks and put them on their marked spaces. Stack the Round & XP tokens together on 0 of their track. Set the Fallen Prince decks aside, pending the Final Battle.
Gather the minion character boards, the demon standees, the tokens, and the dice within easy reach.
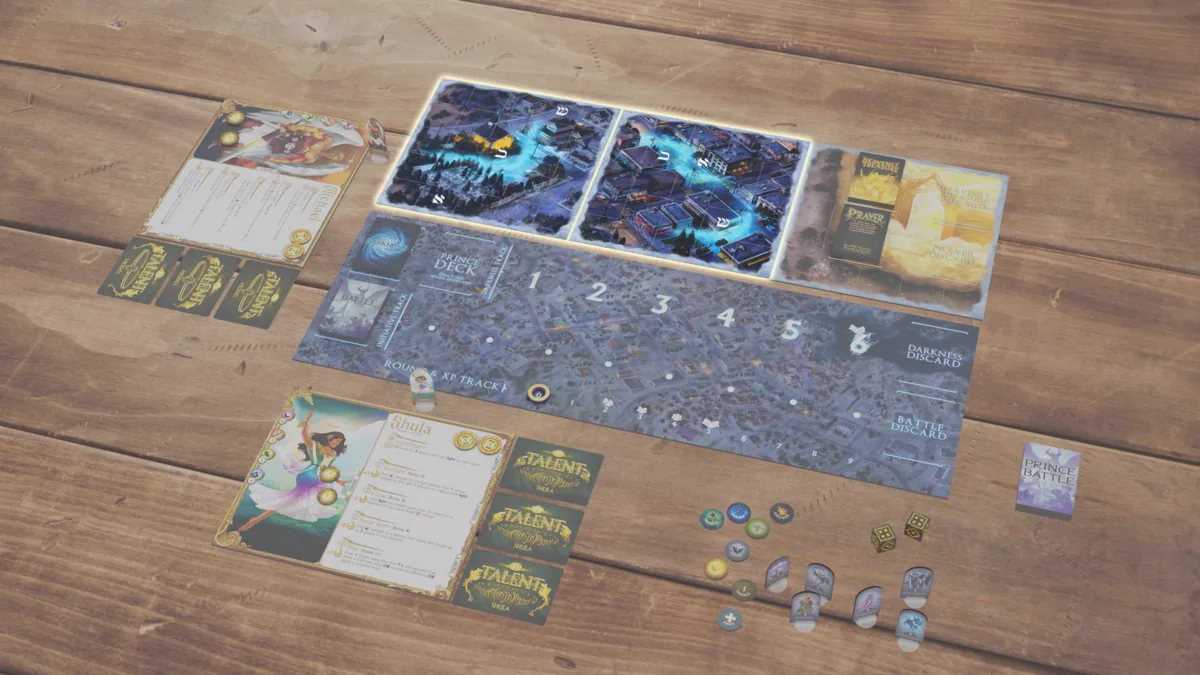
The Heavenly Gates open. Place tile 110 — the angels’ bastion — on either side, in any orientation. It anchors the battlefield. Shuffle the Prayer and Heavenly Treasure decks and put them on their marked spaces.
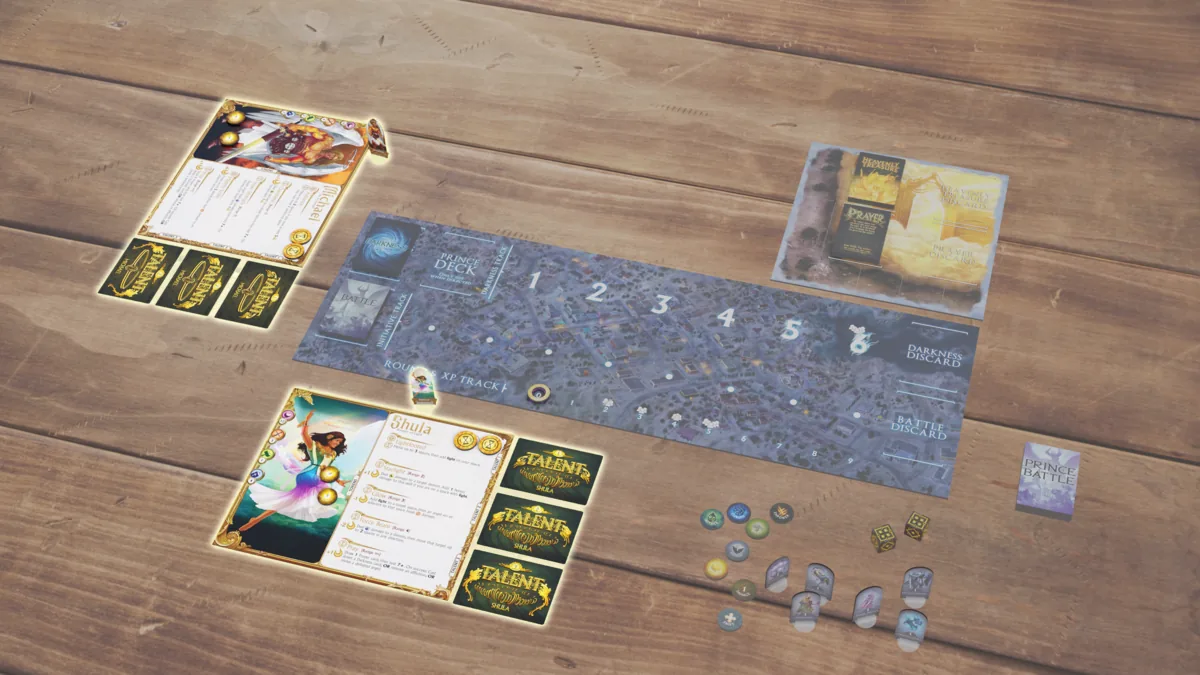
Angels answer the call. Each player picks an angel and takes their character board, standee, and 2 Courage tokens. Place 2 action tokens gold-side up in the action slots. Arrange the Talent decks face-down by level beside the Talent 1–3 markers. An angel may hold up to 5 Courage at any time.
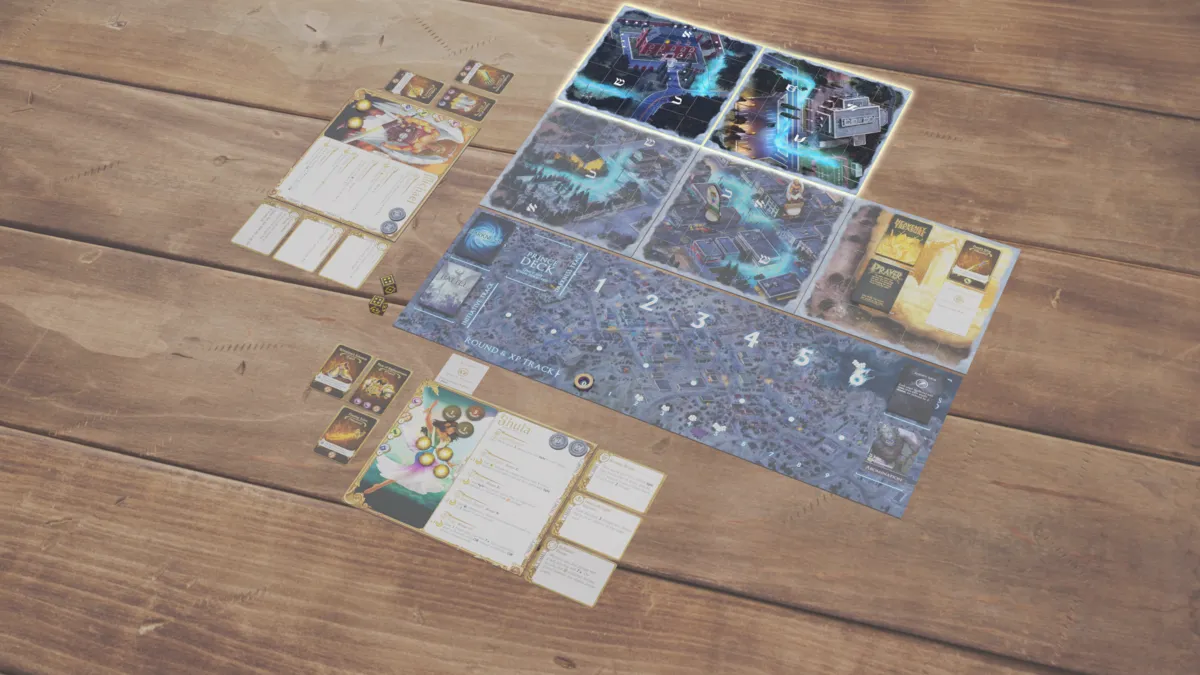
The battlefield unfolds. Starting with the Heavenly Gates, add one map tile per angel. Place each in any orientation, as long as at least one of its spaces shares an edge with a space on the existing map.
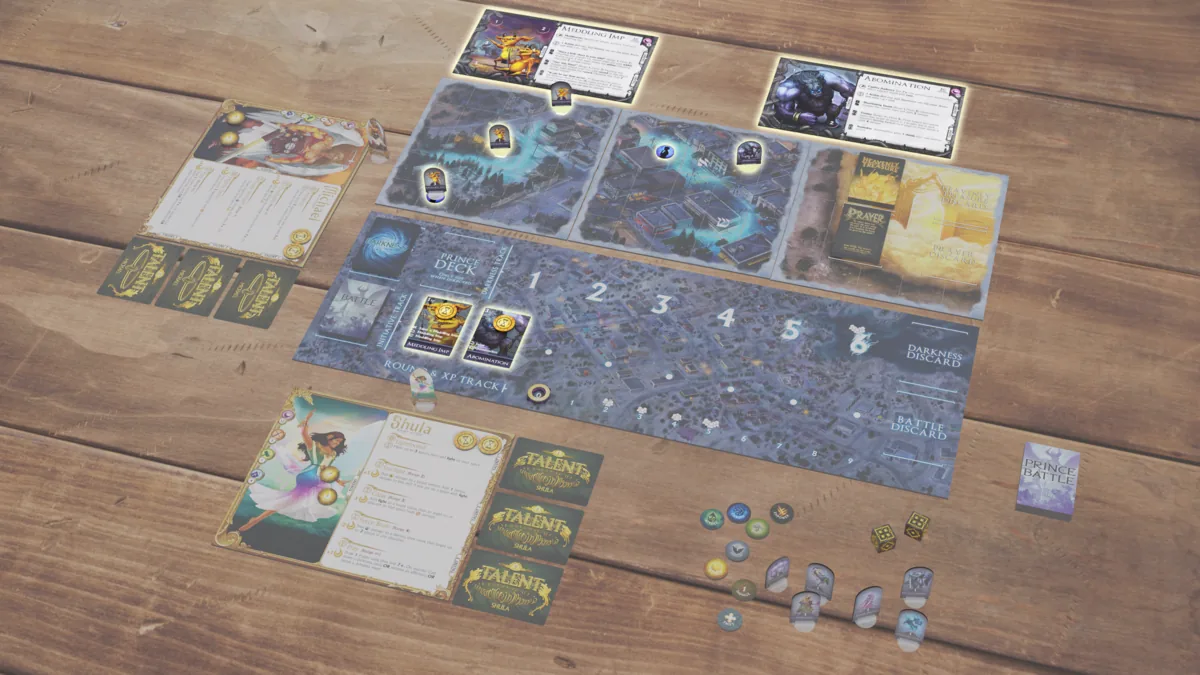
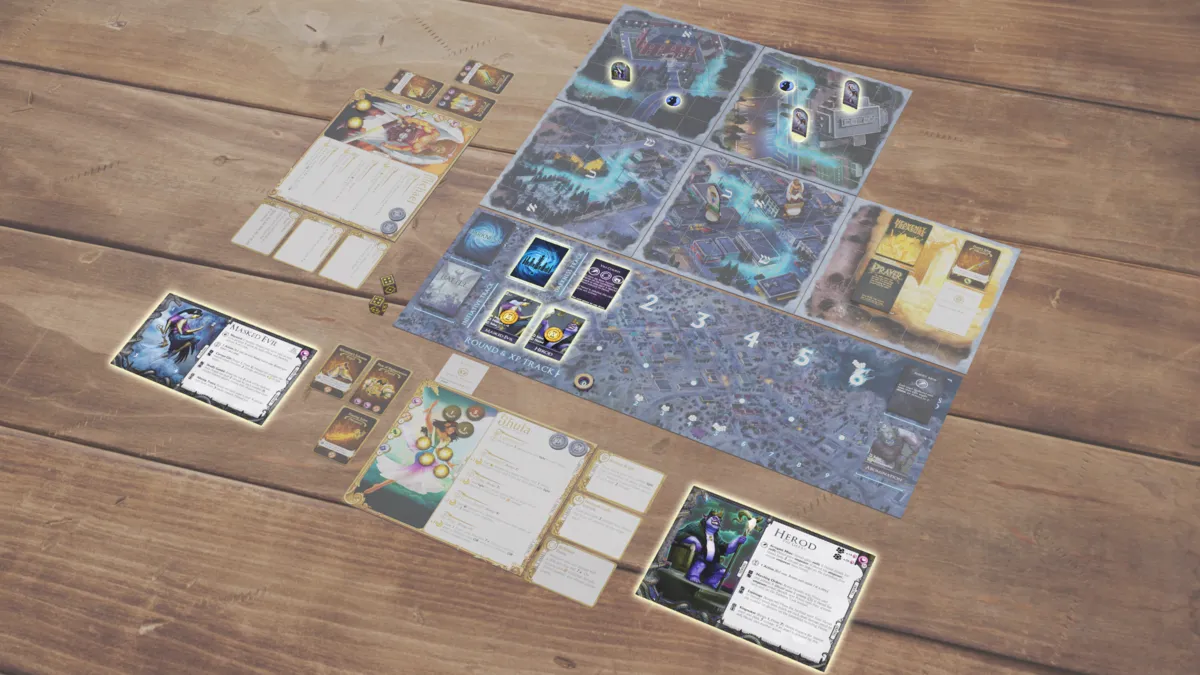
Demons emerge. Stage the map tiles one at a time, in any order. For each tile:
Draw one Battle card.
Place demon standees and saint tokens on the tile spaces it indicates. Saints start oppressed-side up (blue) and can share spaces with demons, angels, and other saints.
Slot the Battle card into the next open space on the Initiative Track with 1 action token gold-side up on it. Discard duplicates. Demons of the same type share one Battle card and act together.
Place the matching demon character boards within reach of whoever will run them.
Angels deploy. Each player places their angel standee on any open space of the Heavenly Gates tile.
Difficulty rises. Pick one of the five difficulties below — the higher the difficulty, the tougher the demons. Adventure is recommended for your first few games. When you’re ready, start the first round with the Refresh phase.
| First-battle demons |
Final Battle demons |
Final Battle Fallen Prince |
Starting angel levels |
|
|---|---|---|---|---|
| Adventure | — | — | — | 0 |
| Heroic | 1 Minor Talent | 1 Major Talent | 1 Prince Talent | 1 |
| Nightmare | 2 Minor Talents | 2 Major Talents | 2 Prince Talents | 2 |
| Abyssal | 2 Major Talents | 2 Major Talents | 3 Prince Talents | 3 |
| Infernal | 2 Major Talents | 2 Major Talents | 3 Prince Talents | 2 |
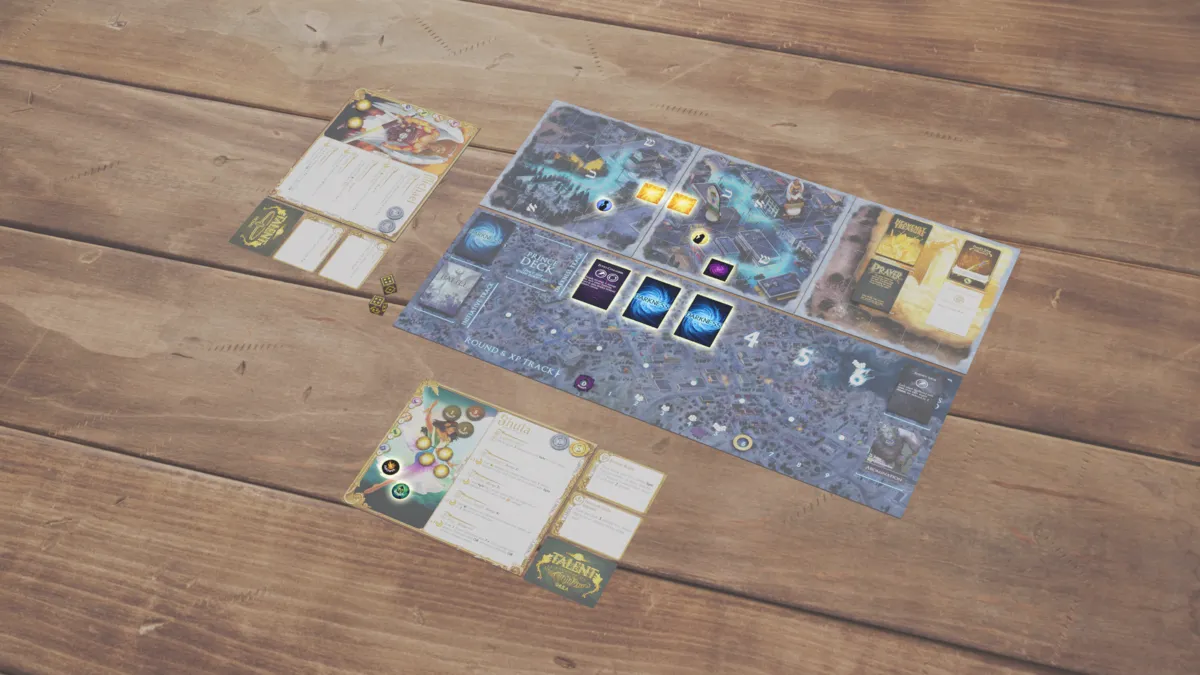
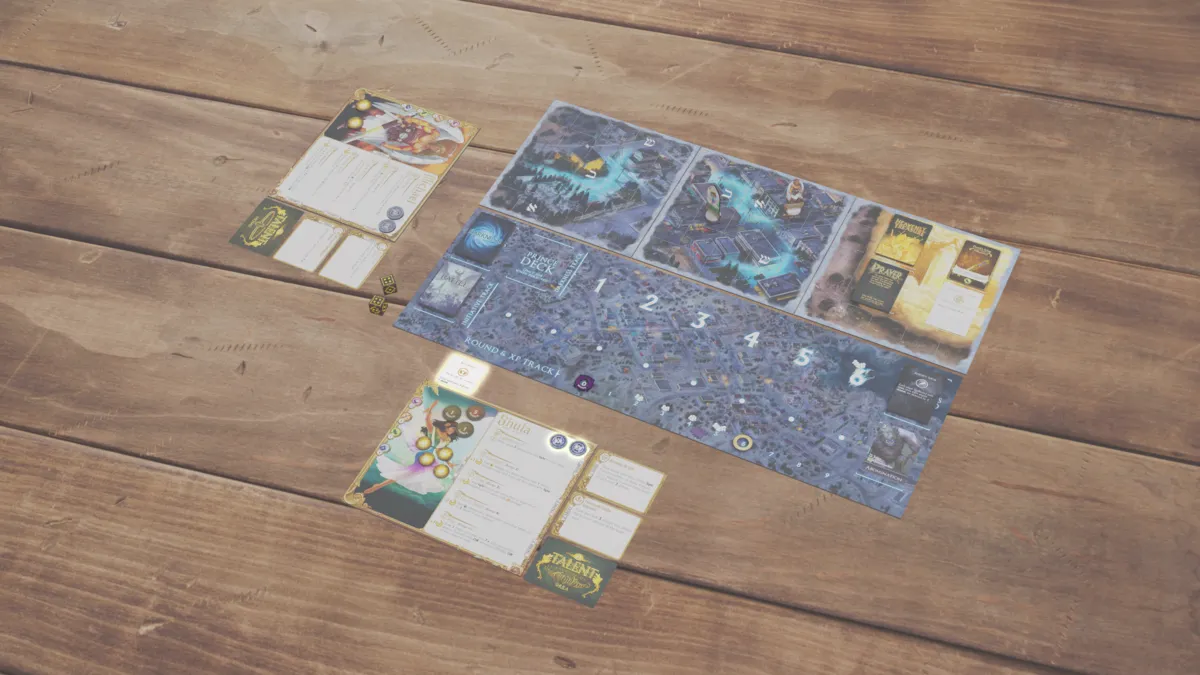
The dust settles. The moment the last demon falls, clear the first battle away:
Remove all status effects from characters and map tiles.
Discard any face-down Darkness cards; face-up cards stay in play.
Remove every saint token. For each protected saint removed, cast down 1 face-up Darkness card (if able).
Leave the angels where they stand, and revive any defeated angel at 1 health on an open space of the Heavenly Gates.
Set the round tracker back to 0.
A moment of grace. For each unused action an angel still holds, draw 1 Prayer card and choose one: gain 1 Courage, cast down 1 face-up Darkness card, or heal 3 damage.
The angels ascend. Each angel gains a free level, without reducing the current XP total. Then, if the group has stored enough experience to gain one or more levels, level up each angel as many times as possible, reducing the Group Experience accordingly.
The battlefield expands. Without moving the angels, add one new map tile to the map per angel.
Fallen Prince and minions emerge. Stage the newly revealed tiles:
Draw 1 Battle card per angel. In place of the last card drawn, shuffle the Prince Battle cards and draw one at random — it names the Fallen Prince who joins the battle.
For each Battle card, place its demon standees and saint tokens on the tile spaces it shows. Saints go oppressed-side up (blue).
Slot each Battle card into the next open space on the Initiative Track with 1 action token gold-side up on it, discarding any duplicate. Place the Fallen Prince’s card last. Demons of the same type share one Battle card and act together.
Set each matching demon character board within reach of whoever will run it.
Place that Fallen Prince’s deck of Prince Darkness cards face-down on its marked space on the Darkness board. Don’t shuffle it as usual — order it by star count, the most stars on the bottom up to the fewest on top, shuffling together any cards that share a star count. Then follow any special-rule setup instructions on the Prince’s board.
Then start the new round from the Refresh phase, as usual. Defeat every demon in this battle, Fallen Prince included, to win!
Mission Setup
Campaign and scenario missions each have their own setup guide, laid out the same way. A mission also opens and closes with story text — the heart of it, and well worth the read.
Set up the Darkness board as usual, round tracker included — the mission guide covers what is particular to it, not the standing setup.
Blue setup box. Be sure to reference this text during the mission, because unlike a skirmish game, you do not necessarily need to defeat all demons to win a mission!
Battlefield. A picture of the finished map: which tiles, their orientation, and where everything starts. Tile numbers sit in the top-left corner of each tile, enlarged in the book so you can read them. Red outlines mark the spaces where angels may start.
Adding foes. Each demon on the battlefield picture has 2–5 red marks — the smallest angel count that brings it into play. They accumulate, so at 5 angels every demon shown is used.
-
2+ Angels
(including solo) -
3+ Angels
-
4+ Angels
-
5+ Angels

Normal only

Challenge only

Normal & Challenge
Initiative Track. The demon types in this mission, left to right, in the order their Battle cards go on the Darkness board. Banners beneath each type name its Demon Talents — blue for Normal difficulty, purple for Challenge, and a banner split blue and purple for a Talent used at both. On Challenge, the blue-only Talents come off and the purple ones go on.
Rewards. The gold box at the end, listing the XP and Heavenly Treasure earned for victory. Mark it on the campaign tracking sheet right away. A Treasure reward names a slot and is drafted — reveal until 2 of that type appear, then keep 1.
Named foes. Missions introduce Lieutenants and Fallen Princes by name. Each borrows the standee of the minion type it most resembles, and its character board is printed in the mission text rather than on a component. Tokens go on the card, not the standee. A named foe’s health scales with angel count — its board shows a base value plus the amount added at higher counts.
Round tracking. Track the round with the round tracking token on the Round & XP Track. The XP token is not used in a campaign — experience arrives as an end-of-mission reward instead. Keep it current: events key off the round, and a mission’s own rules may as well.
Zones. A mission may group its tiles into named zones that are not adjacent until the mission says so. Movement and range can’t cross between them, and gold action tokens on the affected tiles mark when they open.
Shield
When the bearer of Shield is dealt damage from any source, remove 1 Shield per point of damage instead of dealing it. If damage remains after all Shield is gone, deal the rest as normal. 1 Shield and 2 Shield tokens mark how many Shield a character has.
Shield limit. It stacks up to 5, absorbing up to 5 damage.
Skills
A skill is any effect listed on a character board or a Talent card. Both angels and demons have them. Effects on Darkness, Heavenly Treasure, and Prayer cards are not skills.
Some effects work only with skills. For example, empower adds bonus damage when the bearer deals damage with a skill, but not with a Heavenly Treasure or Prayer card.
Angel Skills
Angels use the skills on their character board and Talent cards by spending action tokens. Pay a skill’s costs before it activates, then resolve its parts in the order written. The stats and values in a skill’s text set what it does — its damage, healing, range, or movement.
Some skills list several icons together, such as . This means the first time the skill is used on an angel’s turn, it is a free action. Additional uses of that same skill on the angel’s turn require an action.
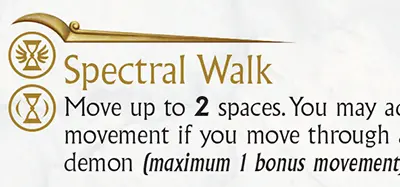
The first time Azrael uses Spectral Walk on his turn, it is a free action. Each additional use on his turn costs an action.
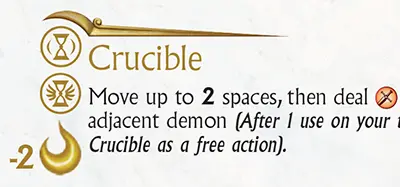
The first time Uriel uses Crucible on his turn, it costs an action and 2 Courage. Each additional use on his turn is a free action, but still costs 2 Courage.
Skill Tokens
A few angels have tokens of their own, placed and retrieved by their skills. Each belongs to that angel alone.
Not status effects. A skill token is neither a boon nor an affliction. It never counts toward effects that scale with the number of tokens on a character, and nothing removes it from play.
-
Raudbjorn’s Axes. Used and placed by Raudbjorn’s skills. When a skill removes them from the battlefield, they return to his character board.
-
Ziyra’s Shofar. Paired with War and Peace on Ziyra’s character board.
Demon Skills
Demons act through skills too, listed on each demon type’s character board along with any equipped Talents. Unlike angels, a demon does not choose its skill — the one it uses is determined during its turn.
Each demon skill lists its own Range and Move values, and its behavior, within its text.
Solo Rules
One player can run up to five angels by following the multi-player rules for that count. For a true solo game, though, play a single angel alongside the Intercessor — an angelic ally interceding from Heaven on your behalf. Set the Intercessor board and their Talent cards beside your angel’s board.
Intercessor board
Counts as an angel. The Intercessor counts as an angel for anything that scales with angel count — map tiles, Battle cards, and Darkness cards. But they don’t enter play on the battlefield: demons and cards can’t target or affect them, and they never gain status effects, Heavenly Treasures, Prayer cards, Courage, Shield, or damage. Effects that scale by “angels on the battlefield” don’t count them.
Actions. Each round, your angel has 2 actions and the Intercessor has 2, tracked with action tokens.
Turn order. Each Action phase, choose your angel or the Intercessor to act first. Then the first demon type acts, then your other angelic character, and finally the remaining demon types, until every demon has taken its turn.
Skill timing. Your angel’s action, activate, and passive skills and Heavenly Treasures work only on the angel’s turn; the Intercessor’s action and free action skills only on the Intercessor’s turn. Cards tied to an angel’s turn — Prayer cards, for instance — may be played on either turn, and a Prayer card played on the Intercessor’s turn applies to your battlefield angel.
Talents. Unlocking a Talent slot on your angel’s campaign tracking sheet unlocks the matching slot for the Intercessor as well. Equip one card per slot, three apiece — and the two need not match in level, so long as each level you use is unlocked on the sheet.
Targeting. A card or skill that targets “another angel” may target your solo angel, but its effect applies only once per target.
Defeat. Your solo angel can be revived only by immediately playing an interrupt card or skill (“Play any time. Not an action”). Defeated any other way, you lose the game.
Special Rule
A special rule adjusts the normal rules and must be observed whenever it is referenced. Special rules appear mainly on demon character boards and Prince Darkness cards — read these carefully, as they can change how a demon acts or how a battle is set up.
Status Effects Summary
Status effects are positive boons and negative afflictions.
Boons
-
-
-
Prudence. The bearer may discard it at any time to reroll a single die roll. On a test, choose one die to reroll, not both.
-
Swift. The bearer adds 1 additional space to their maximum movement.
-
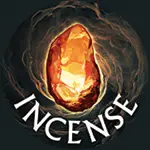
Incense. Affects a space on the map. Any time on their turn, an angel may remove any amount of incense on or adjacent to their space to heal 1 damage per incense removed.
-
Light. Affects a space on the map. When an angel ends their turn in this space, they heal 1 damage.
-
Squall. Placed on the edge between two spaces. An angel crossing any number of squall tokens adds 1 to their movement total for that action.
Afflictions
-
Blight. If the bearer would gain 3 blight, they are dealt 3 damage, then remove all of their blight.
-
Cursed. When the bearer fails a test, they are dealt 1 damage.
-
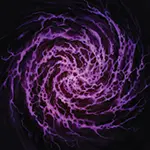
Gloom. If the bearer would heal or gain shield, first reduce that amount by 2, then remove gloom.
-
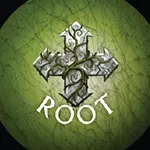
Root. The bearer’s next movement is reduced to 0, then discard root.
-
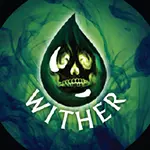
Wither. When the bearer ends their turn, they are dealt 1 damage.
-
Shadow. Affects a space on the map. When an angel ends their turn in this space, they are dealt 1 damage.
-
Veil. Affects a space on the map. Angels may not calculate range into or through veil unless they are on or adjacent to it.
Light, shadow, and veil cannot share a space.
Status Effects
Status effects are positive boons and negative afflictions. Those borne by a character affect angels and demons alike; those placed on the map affect only angels. Most last until a card or action removes them, and all of a character’s status effects clear when a battle ends or that character is defeated. They don’t stack unless a card, skill, or the effect itself says so.
Each is an ongoing effect that triggers when its condition is met, and the icon beside each one below shows how it is used. When several would resolve at once, boons resolve before afflictions — though players may choose any order, and if they can’t agree, the angel holding the Initiative token decides.
Select a token below for details.
Boons
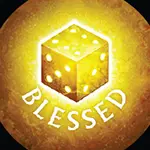
Blessed. When the bearer passes a test, they heal 1 damage. Skills on Talents or characters, Heavenly Treasure effects, and Prayer cards all trigger it.
Empower. When the bearer deals damage with a skill, add 1 to each instance of damage dealt. Only skills on character or Talent cards count — not other bonus damage, Heavenly Treasures, or Prayer cards.
Prudence. The bearer may discard it from their character board at any time to reroll a single die roll. On a test, choose one die to reroll, not both.
Swift. The bearer adds 1 additional space to their maximum movement. A demon always uses it unless already adjacent to or in range of its target.
Incense marks a space. At any point in their turn, an angel on or adjacent to a space with incense may remove any amount of it, healing 1 damage per token removed.
Light marks a space. An angel who ends their turn there heals 1 damage. Any effect that removes a boon removes it. A shadow placed on the space flips the token to its shadow side instead.
-
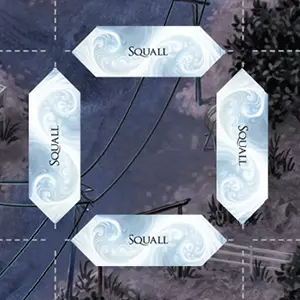
Squall placement
Squall sits on the edge between two spaces, but never on a barrier. An angel crossing any number of squall tokens adds 1 to their movement total for that action.
Afflictions
Blight. Unlike other status effects, blight stacks. The first goes on the bearer’s character board, and a second flips the token to its “2” side. On gaining a third, discard the token — the bearer is dealt 3 damage.
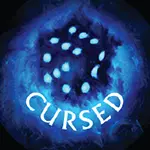
Cursed. When the bearer fails a test, they are dealt 1 damage. Skills on Talents or characters, Heavenly Treasure effects, and Prayer cards all trigger it.
Gloom. If the bearer would heal or gain shield, reduce that amount by 2 first, then remove gloom.
Root. The bearer’s next movement is reduced to 0, then discard the affliction. Effects that place, put, or swap a character don’t count as movement, so root doesn’t stop them.
Wither. When the bearer ends their turn, they are dealt 1 damage.
Shadow marks a space. An angel who ends their turn there is dealt 1 damage. A Pray action, skill, or any affliction-removing effect removes it. A light placed on the space flips the token to its light side instead.
Veil marks a space. Angels may not count range into or through it unless they are on or adjacent to it, and may only target it with skills from those spaces — though Prayer cards that remove afflictions or place light are not restricted. Demons ignore veil entirely. It may replace or be replaced by light or shadow; only one of the three occupies a space at a time.
Stronghold
A stronghold is a Darkness card that cannot be cast down or otherwise removed from play, except as its own text allows. A stronghold stays in play until all demons are defeated, and is found mostly on Prince cards.
Talent Cards
Talent cards expand a character’s skills — adding new abilities, upgrading existing ones, or granting ongoing effects. Every Talent deck belongs to one specific character: an angel, or a type of demon. Angels gain Talents as they grow in power; demons receive them to grow more dangerous.
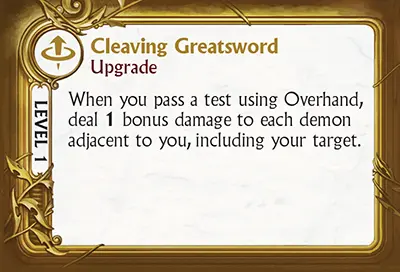
Angel Talent card
Gaining a Talent. An angel gains a Talent on leveling upleveling up. Draw 2 from the lowest-level unrevealed Talent deck, keep 1, shuffle the other back, and place the chosen card face-up on top. Angels level up through XP mid-game in skirmish and scenarios, or between missions in a campaign.
Slot limit. An angel has 3 Talent slots — 3 Talents at once, at most. That’s one Talent of each level: 1, 2, and 3. Use any unlocked combination — even repeats of a level — and re-pick between missions to suit what’s ahead.
Effect icons. An angel’s Talent is a new or upgraded skill, and may have any of these:
- action — use it on your turn as an action.
- free action — use it on your turn as a free action.
- interrupt — use it any time, or when the card’s condition is met.
- passive — an ongoing effect on the angel.
- upgrade — improves an existing skill on the angel’s character board.
Demon Talents make a foe deadlier — adding health, new skills, or changed behavior. Equip them when instructed in higher difficultieslater campaign missionscertain scenarios. A Talent affects every demon of its type unless the card says otherwise.
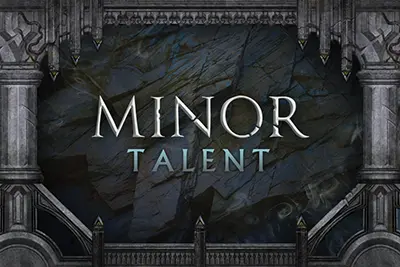
Types. Minor, Major, and Prince — named on the card back and its left edge. Major Talents hit harder than Minor; a Prince Talent belongs to one named Fallen Prince.
Health and skills. Most Talents add Health; indicated by an icon and number in the card’s top-right corner. Included skills may be activate or passive.
Resolving. On a demon’s turn, resolve its activate Talents from the top down, before working through the rest of its character board.
When a new demon type enters play and needs a Talent, draw a random one of the indicated typeadd one as the mission specifies. A Fallen Prince uses only its own character-specific Talents.
Tests
Some cards and skills call for a test, always with a target number (e.g. test 7+) or an X defined in the accompanying text — the value you must reach to pass.
Making a test. Roll two 6-sided dice and add them; bonuses and penalties modify the result, then compare it to the target number.
Skipping. A test with a positive or negative consequence must be rolled; one with no consequence may be skipped to save time — but check your characters, status effects, and cards in play first. A skill that says you may test is always optional.
Anonymous tests. Prayer and Darkness cards often don’t say who is testing. In those cases no boons, afflictions, or bonuses trigger from the test, though certain cards may still influence the result.
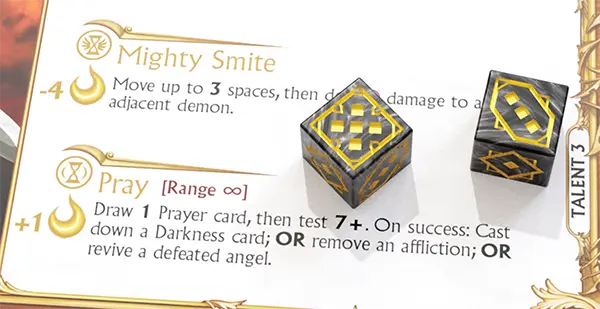
Michael uses Pray — he spends an action, gains a Courage, draws a Prayer card, and tests 7+. He rolls an 8 and passes, then chooses his reward: cast down a Darkness card, remove an affliction, or revive a defeated ally.
Strategy & Tips
While the forces of Light most certainly win in the end, it might not feel that way against the epic Fallen Princes and the forces of Darkness in Deliverance. Use these tips to strengthen your resolve, turn around your misfortunes, and even equip you for the higher difficulties!
Tip #1: Ignore the saints at your own peril!
Many valiant angels have been tempted by the epic battle prowess of their character, and they unfortunately neglect the saints they are charged to protect. This has drastically negative consequences for the angels, as Darkness will flood into the spirit realm uncontrolled! During your battles against the Forces of Darkness, try to move into positions that protect saints whenever possible, and focus your attention upon demons brazen enough to oppress them.
Tip #2: The demons aren’t the only threat…
The Darkness is ever encroaching, and you cannot stop it. But with effort, you might hold it back long enough to crush your demonic foes! If the Darkness track fills up, the damage will spiral out of control. Focus on casting down these Darkness cards. Face-up cards are usually the priority to cast down, but sometimes the greatest threat is the unknown. Therefore, it is never a waste to cast down face-down cards, either! And remember, a great way to stay on the offense and slow the flow of Darkness down is to protect the saints! If you neglect the saints, no Prayer will save you from the Darkness.
Tip #3: Prayer is powerful!
Prayer is the angel’s answer to the Darkness, but relying on it as a reactionary tool against the Darkness is not the only way to use your angel’s Pray action. The best angelic warriors are proactive in their prayers! Prayer cards give you “answers” to the unknown horrors that await inside the Darkness deck, or twisted tactics that the demons might throw at you. The most valuable elements of the Pray action are the resources you gain (1 Courage and a Prayer card). The successful test is the bonus and not the only reason to use it.
Great Deliverance players will use Prayer cards to earn amazing results and survive seemingly impossible scenarios! And if you’re ever “on the fence” about whether to use a Pray action or do something else at a critical time, glance at the flavor text of the top Prayer card of the Prayer deck — this text gives a hint to the card’s effect.
Tip #4: Efficient angels strike terror into the forces of Darkness!
Deliverance is typically won by defeating your foes, but how efficiently you deal damage can often spell the difference between a well-earned victory and a nail-biting defeat. The more damage you deal with your resources (actions and Courage tokens), the greater your efficiency! For example, Christine’s Lightning Stab skill costs 1 Courage and deals 3 damage to up to 2 targets. Whenever you use this skill, you should almost always be dealing damage to 2 targets. There are exceptions to the rule, though — if you need the damage (or range) of Lightning Stab to deal that last bit of damage to a low health demon, then do it!
Tip #5: The Deliverance Community is here to help!
If you still feel crushed by the Forces of Darkness, or if you have advice that made a difference to your own games, we would love to hear it! Join us on the Discord server, the Facebook group, or the BoardGameGeek forums.
More about Deliverance — and what Lowen Games is working on next — at PlayDeliverance.com.
Heavenly Treasure
Heavenly Treasures are unique items that add power and grant new skills to angels.
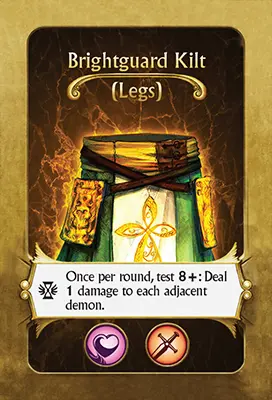
Heavenly Treasure card
Gaining a treasure. When an angel gains a Heavenly Treasure — after leveling upleveling up, or from a card effect — draw 2 from the Heavenly Treasure deck, equip 1, and discard the other face-up on the Heavenly Gates tile.
Equipping. An angel may equip up to 5 at a time. Treasures can’t be traded between players, but an angel may discard an equipped one to make room for another.
There is no item-type restriction.
Those 5 are one of each type — weapon, helm, chest, gloves, and legs — recorded on the campaign tracking sheet.
Stat bonuses. A Health, Strength, Discipline, or Wisdom icon raises that stat by 1 while the treasure is equipped; discard the treasure and the bonus is lost.
An angel can never be defeated by discarding a treasure: if that would leave damage at or above maximum health, remove damage tokens until 1 health remains.
Effect icons on Heavenly Treasures are:
- activate — activates immediately when gained, and never again.
- action — use it on your turn as an action.
- free action — use it on your turn as a free action.
- interrupt — use it at any time.
- passive — an ongoing effect on the angel; follow the card text.
Single-use treasures are marked Use once and used a single time. Mark one used by placing an action token gray-side up on the card — it stays spent for the rest of the game.
Penalties. A treasure may instead impose an ongoing passive penalty: permanent while equipped, and active even while the angel is defeated. A penalty can’t drop a stat, movement, or range below 1. Discard an equipped treasure at any time to shed its penalty.
Upgrade
An upgrade changes or enhances an existing skill on your character board, rather than adding a new effect of its own. Upgrades are found on some angel Talent cards.